Hello, friends!
I have been meaning to put a tutorial on these fun tissue tassel garlands for a while now. They are so fun and add such a nice touch to dessert/drink station, balloons and backdrops!
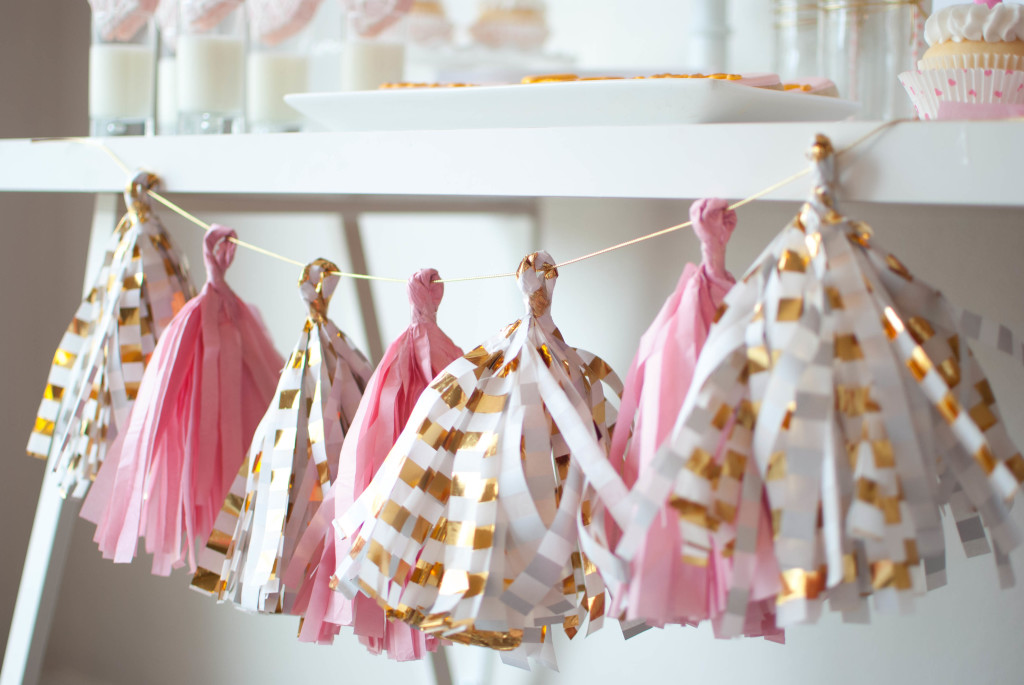
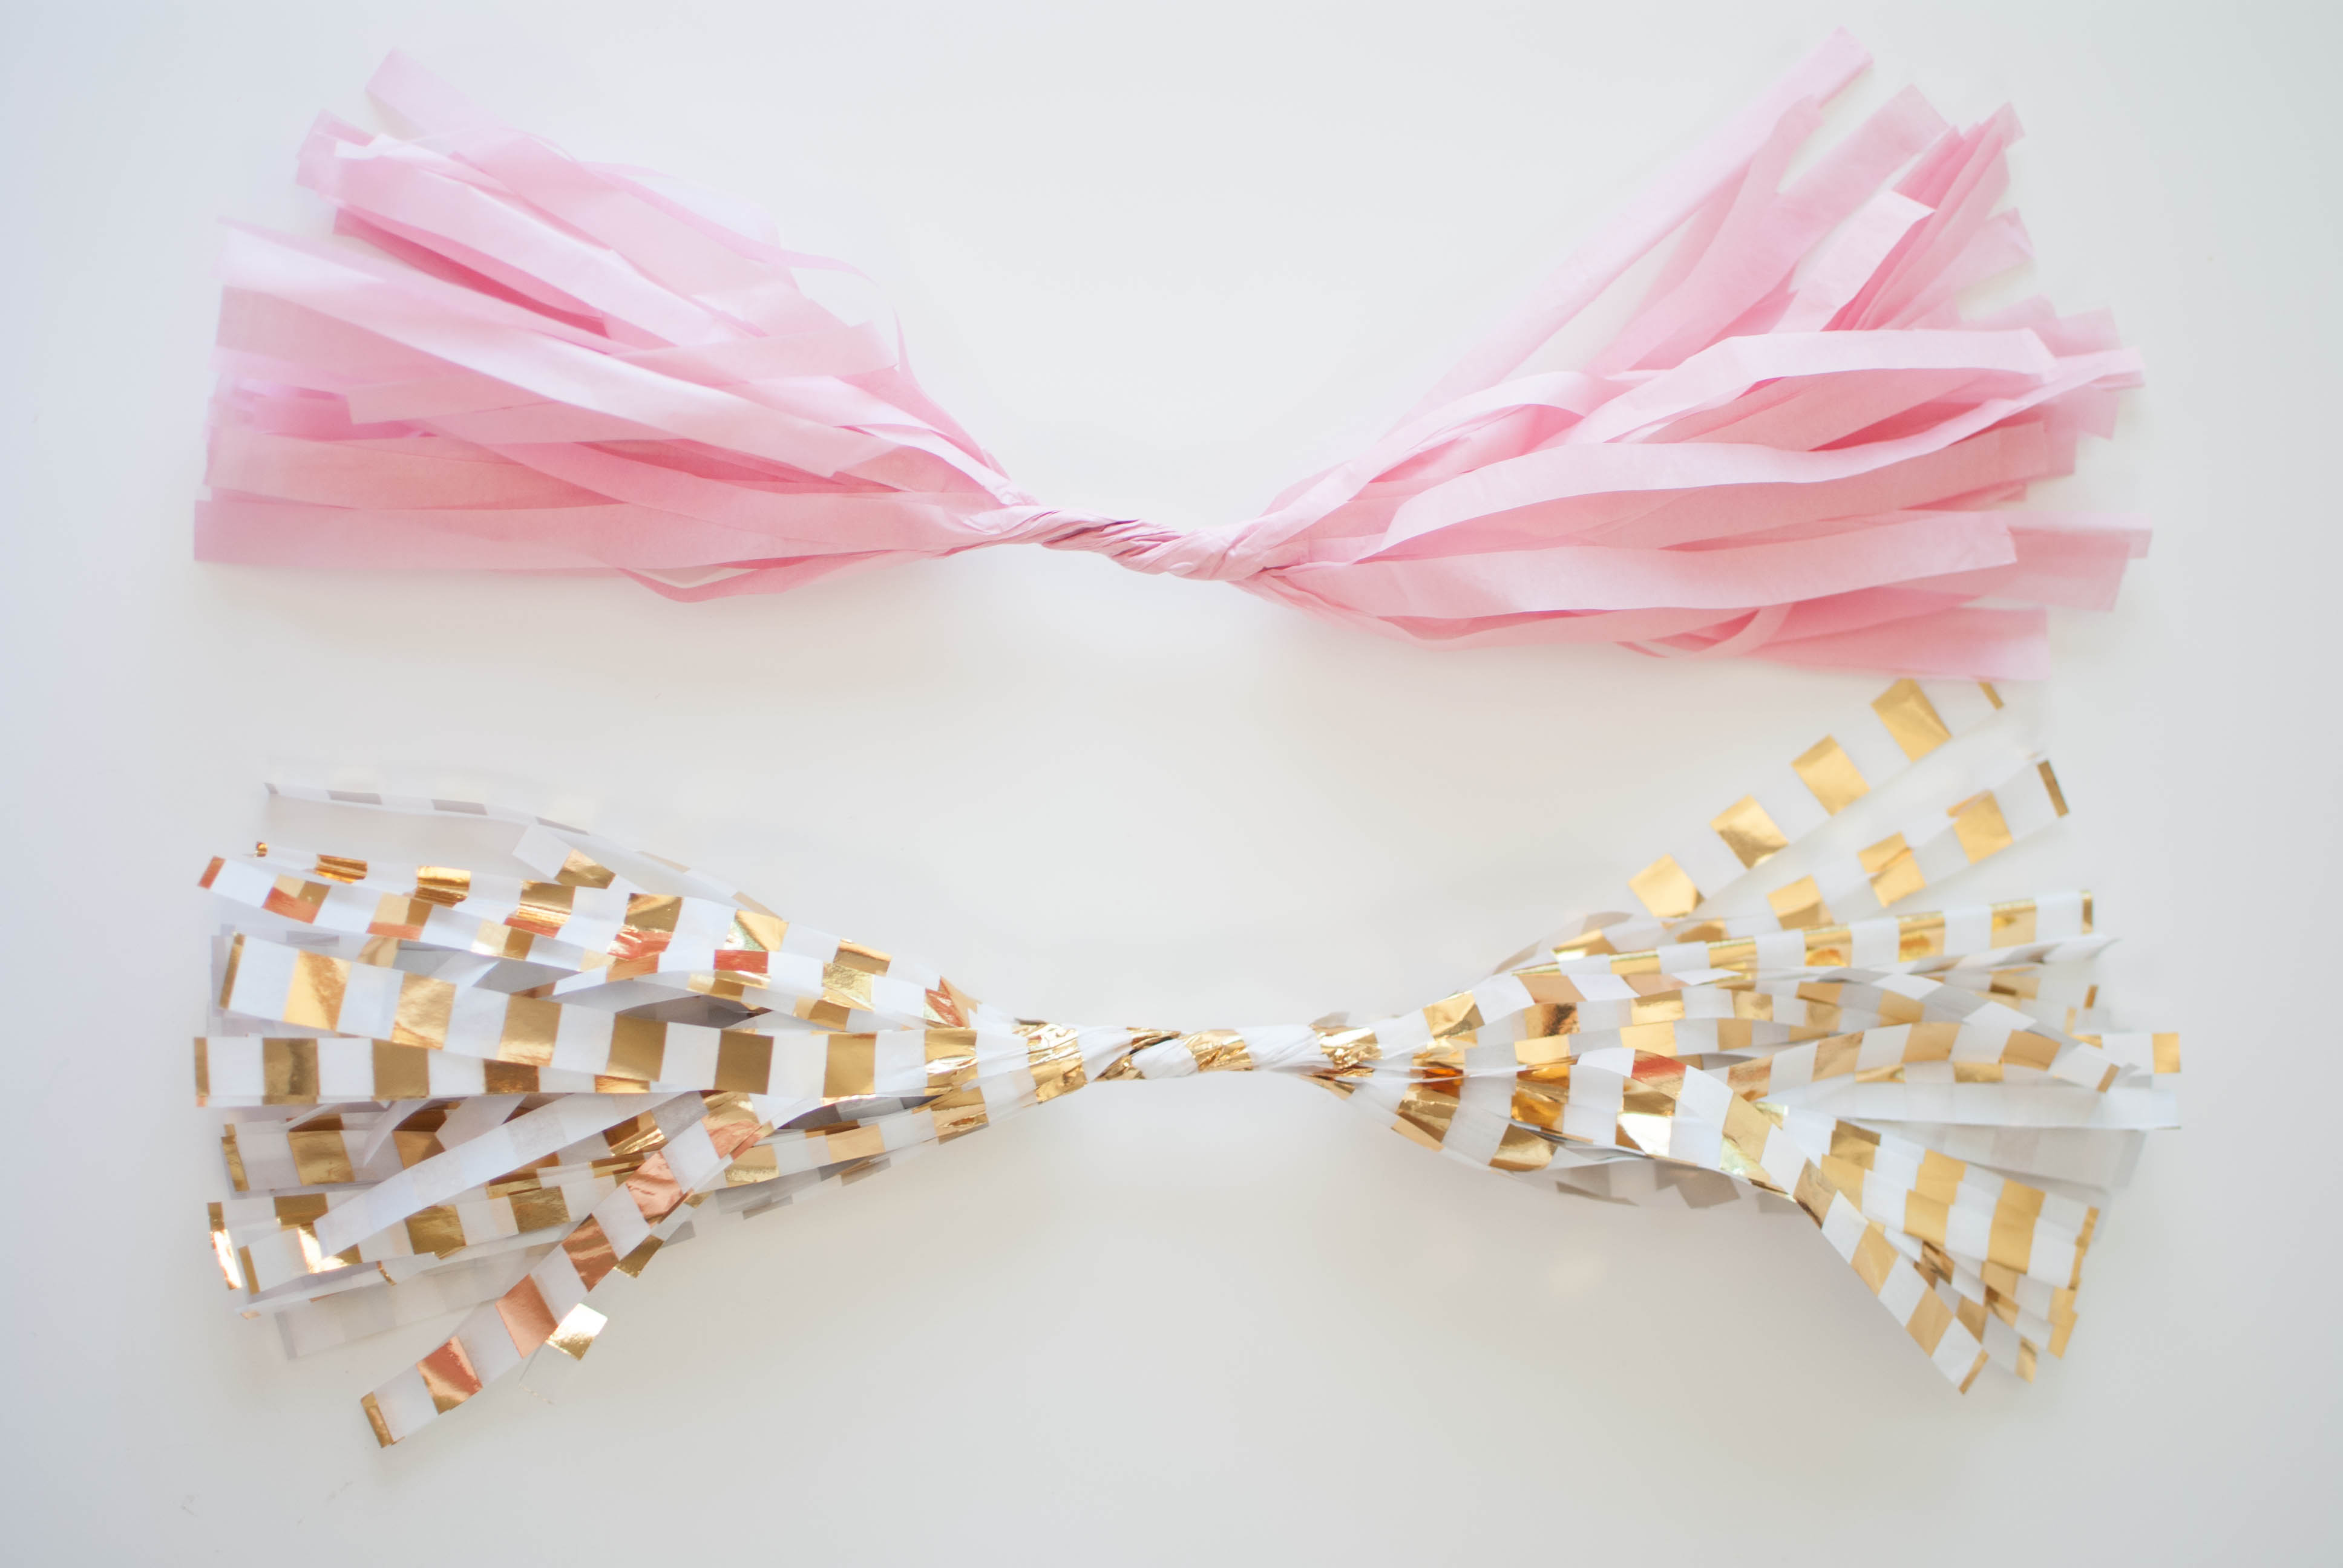
I was at Target the other day and when I saw the gold & white tissue paper (which is a combination of mylar and matte), I feel in love with it! I bought enough to make a garland for our Mini Valentine’s Day styled shoot, which is coming to the blog today!
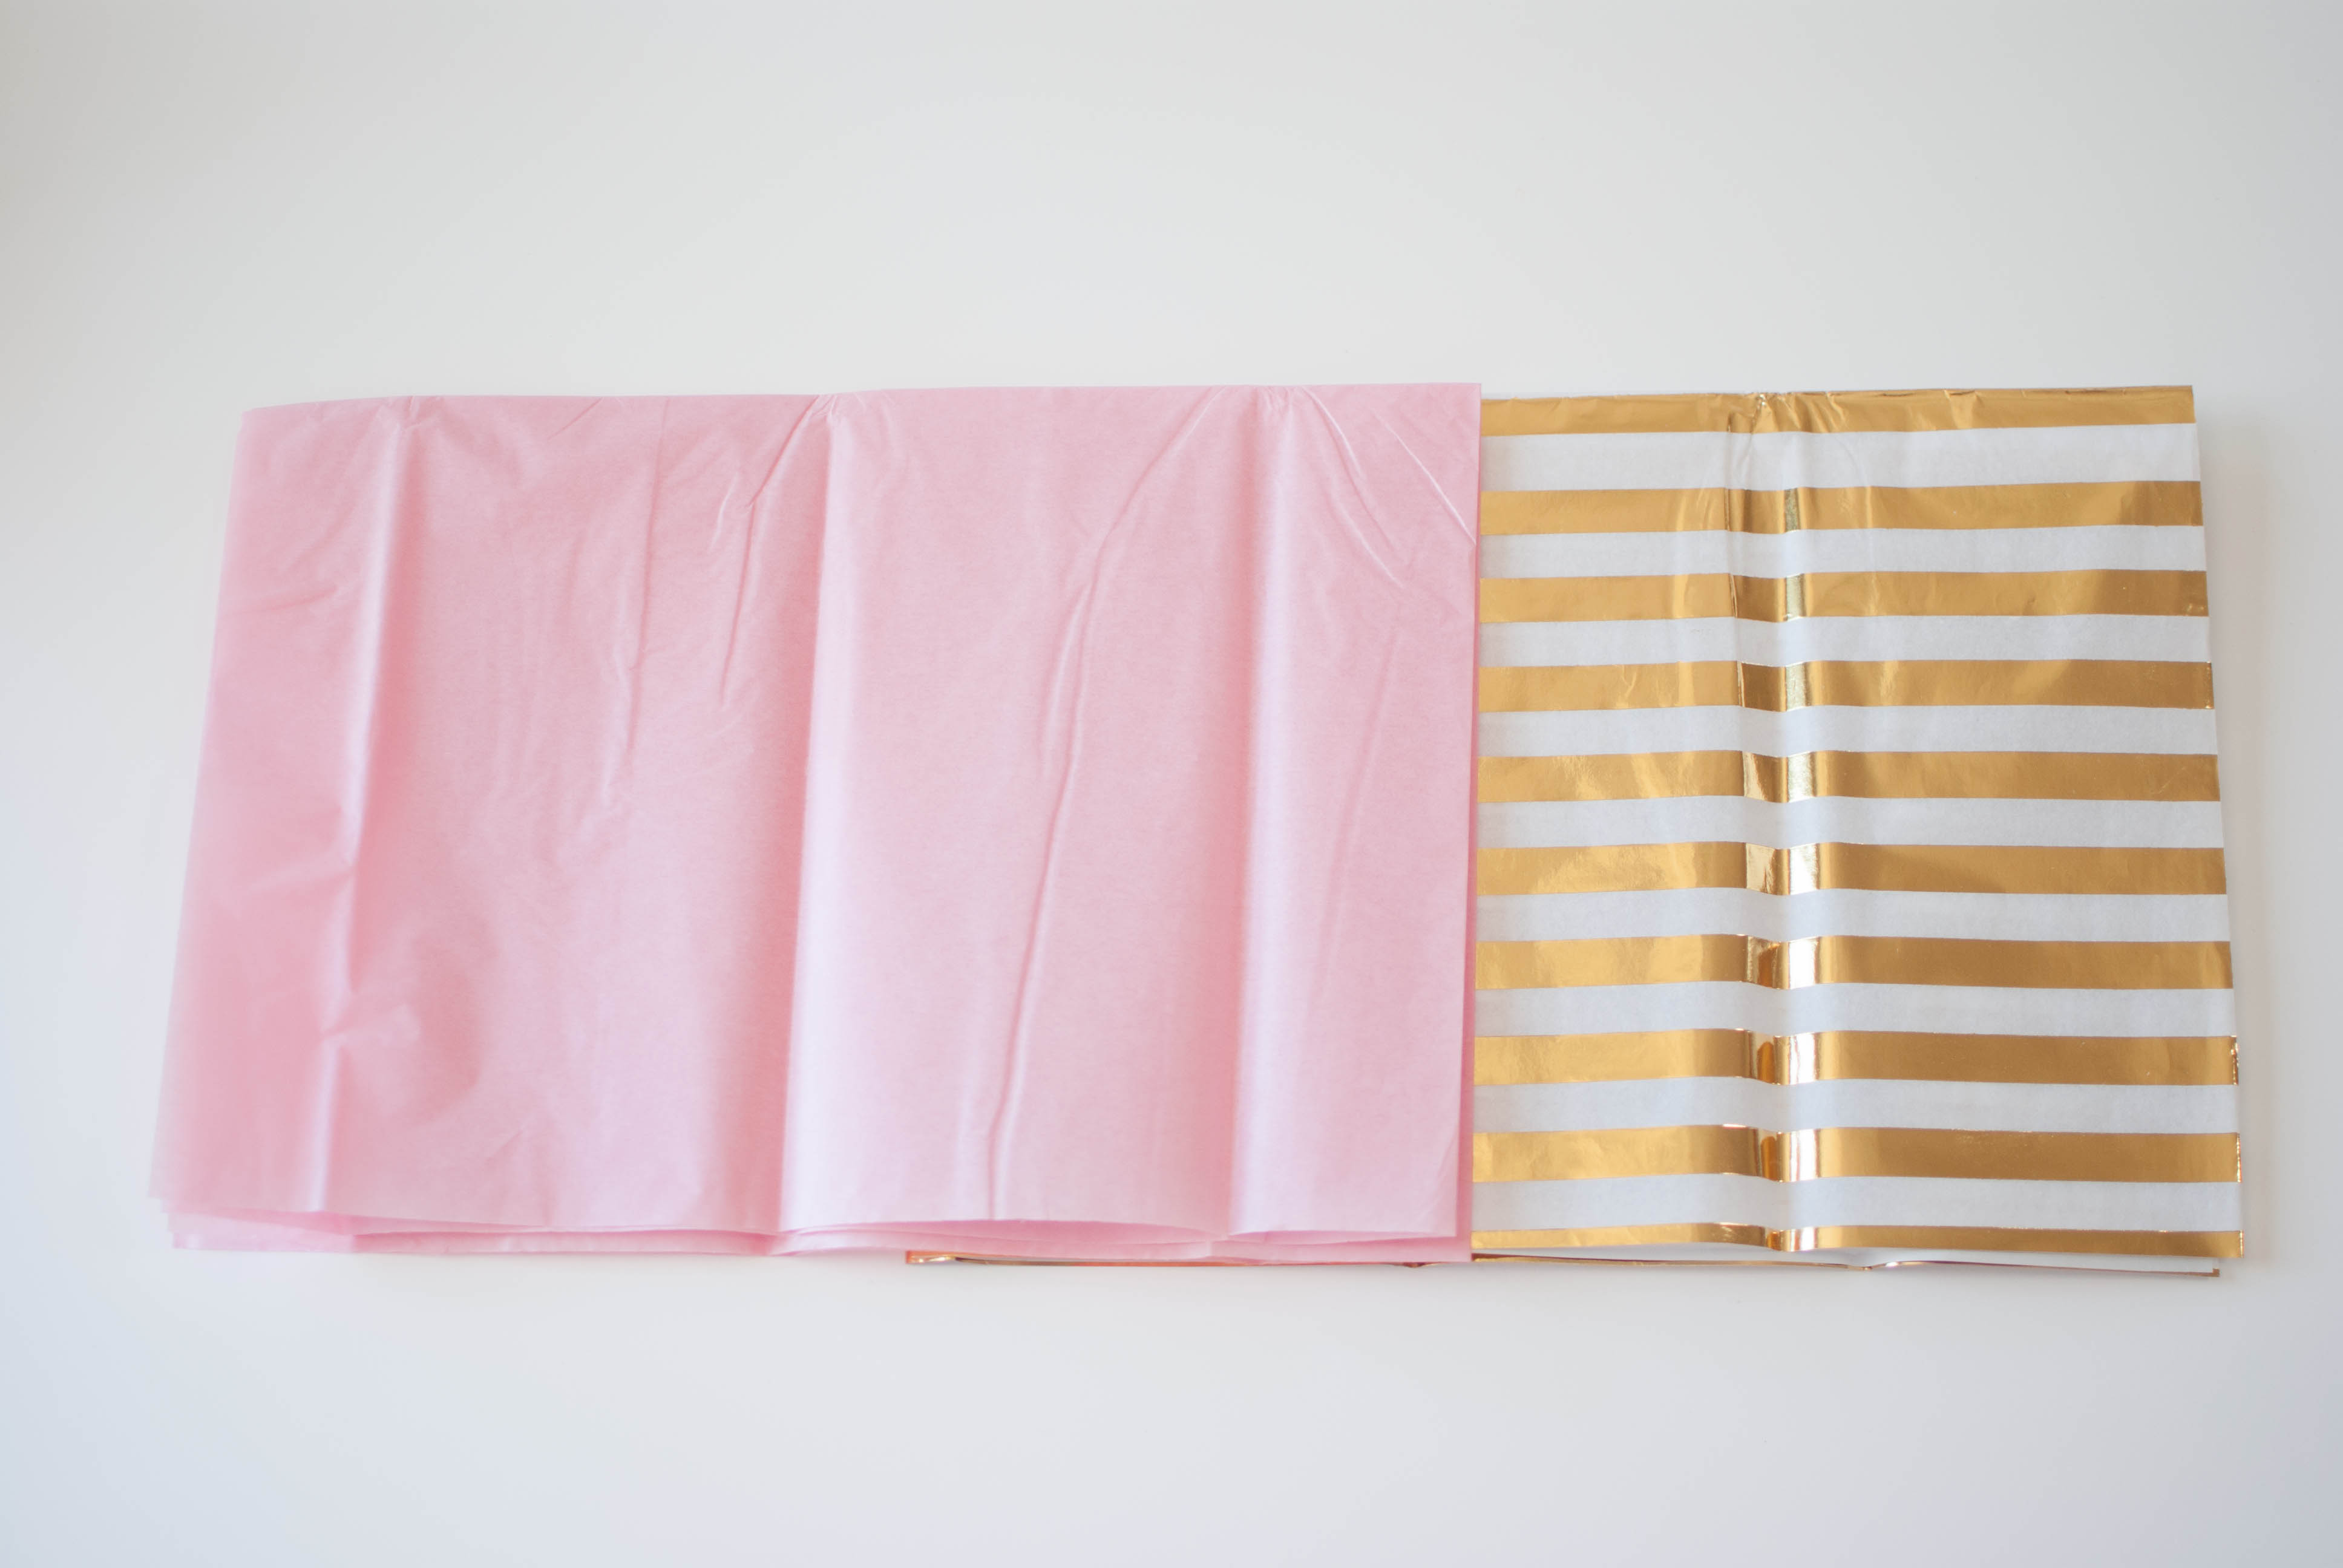
I used a mix of pink matte and white & gold sheets. Perfect for the look I was looking to achieve!

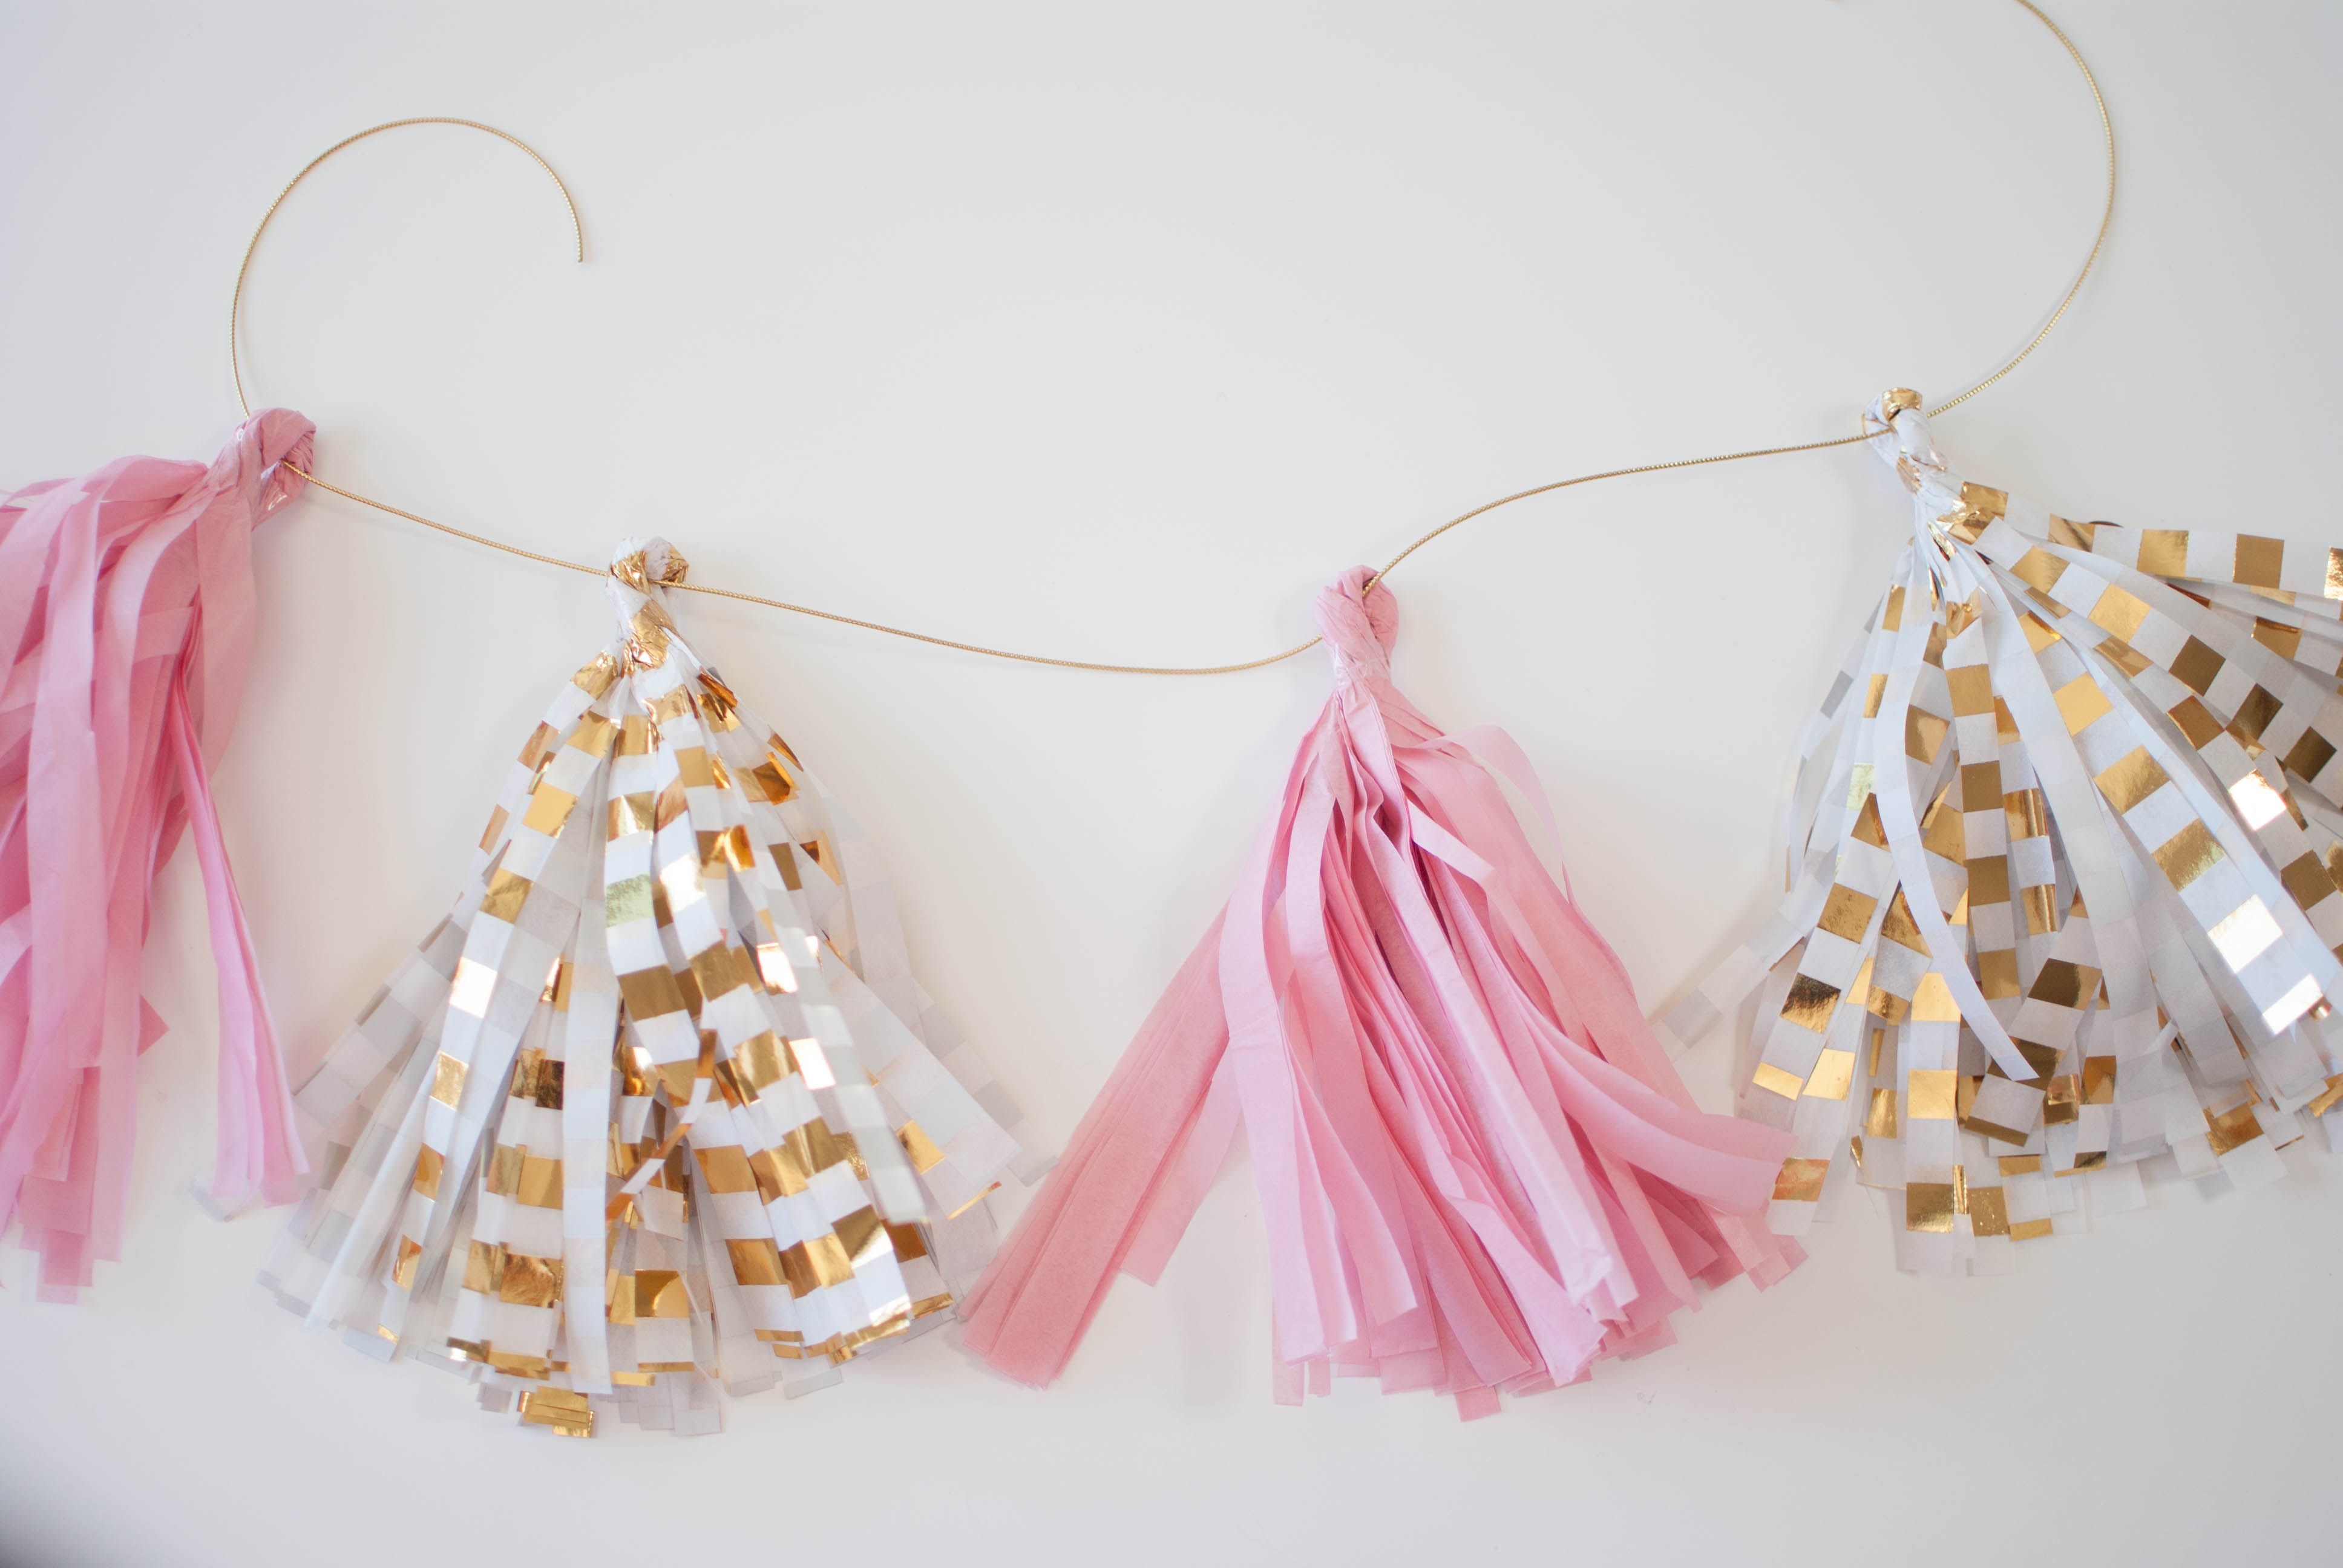
Don’t they look so fun? Can’t go wrong with pink & gold!
Now, gather the supplies and tools and make your own garland following our easy tutorial!
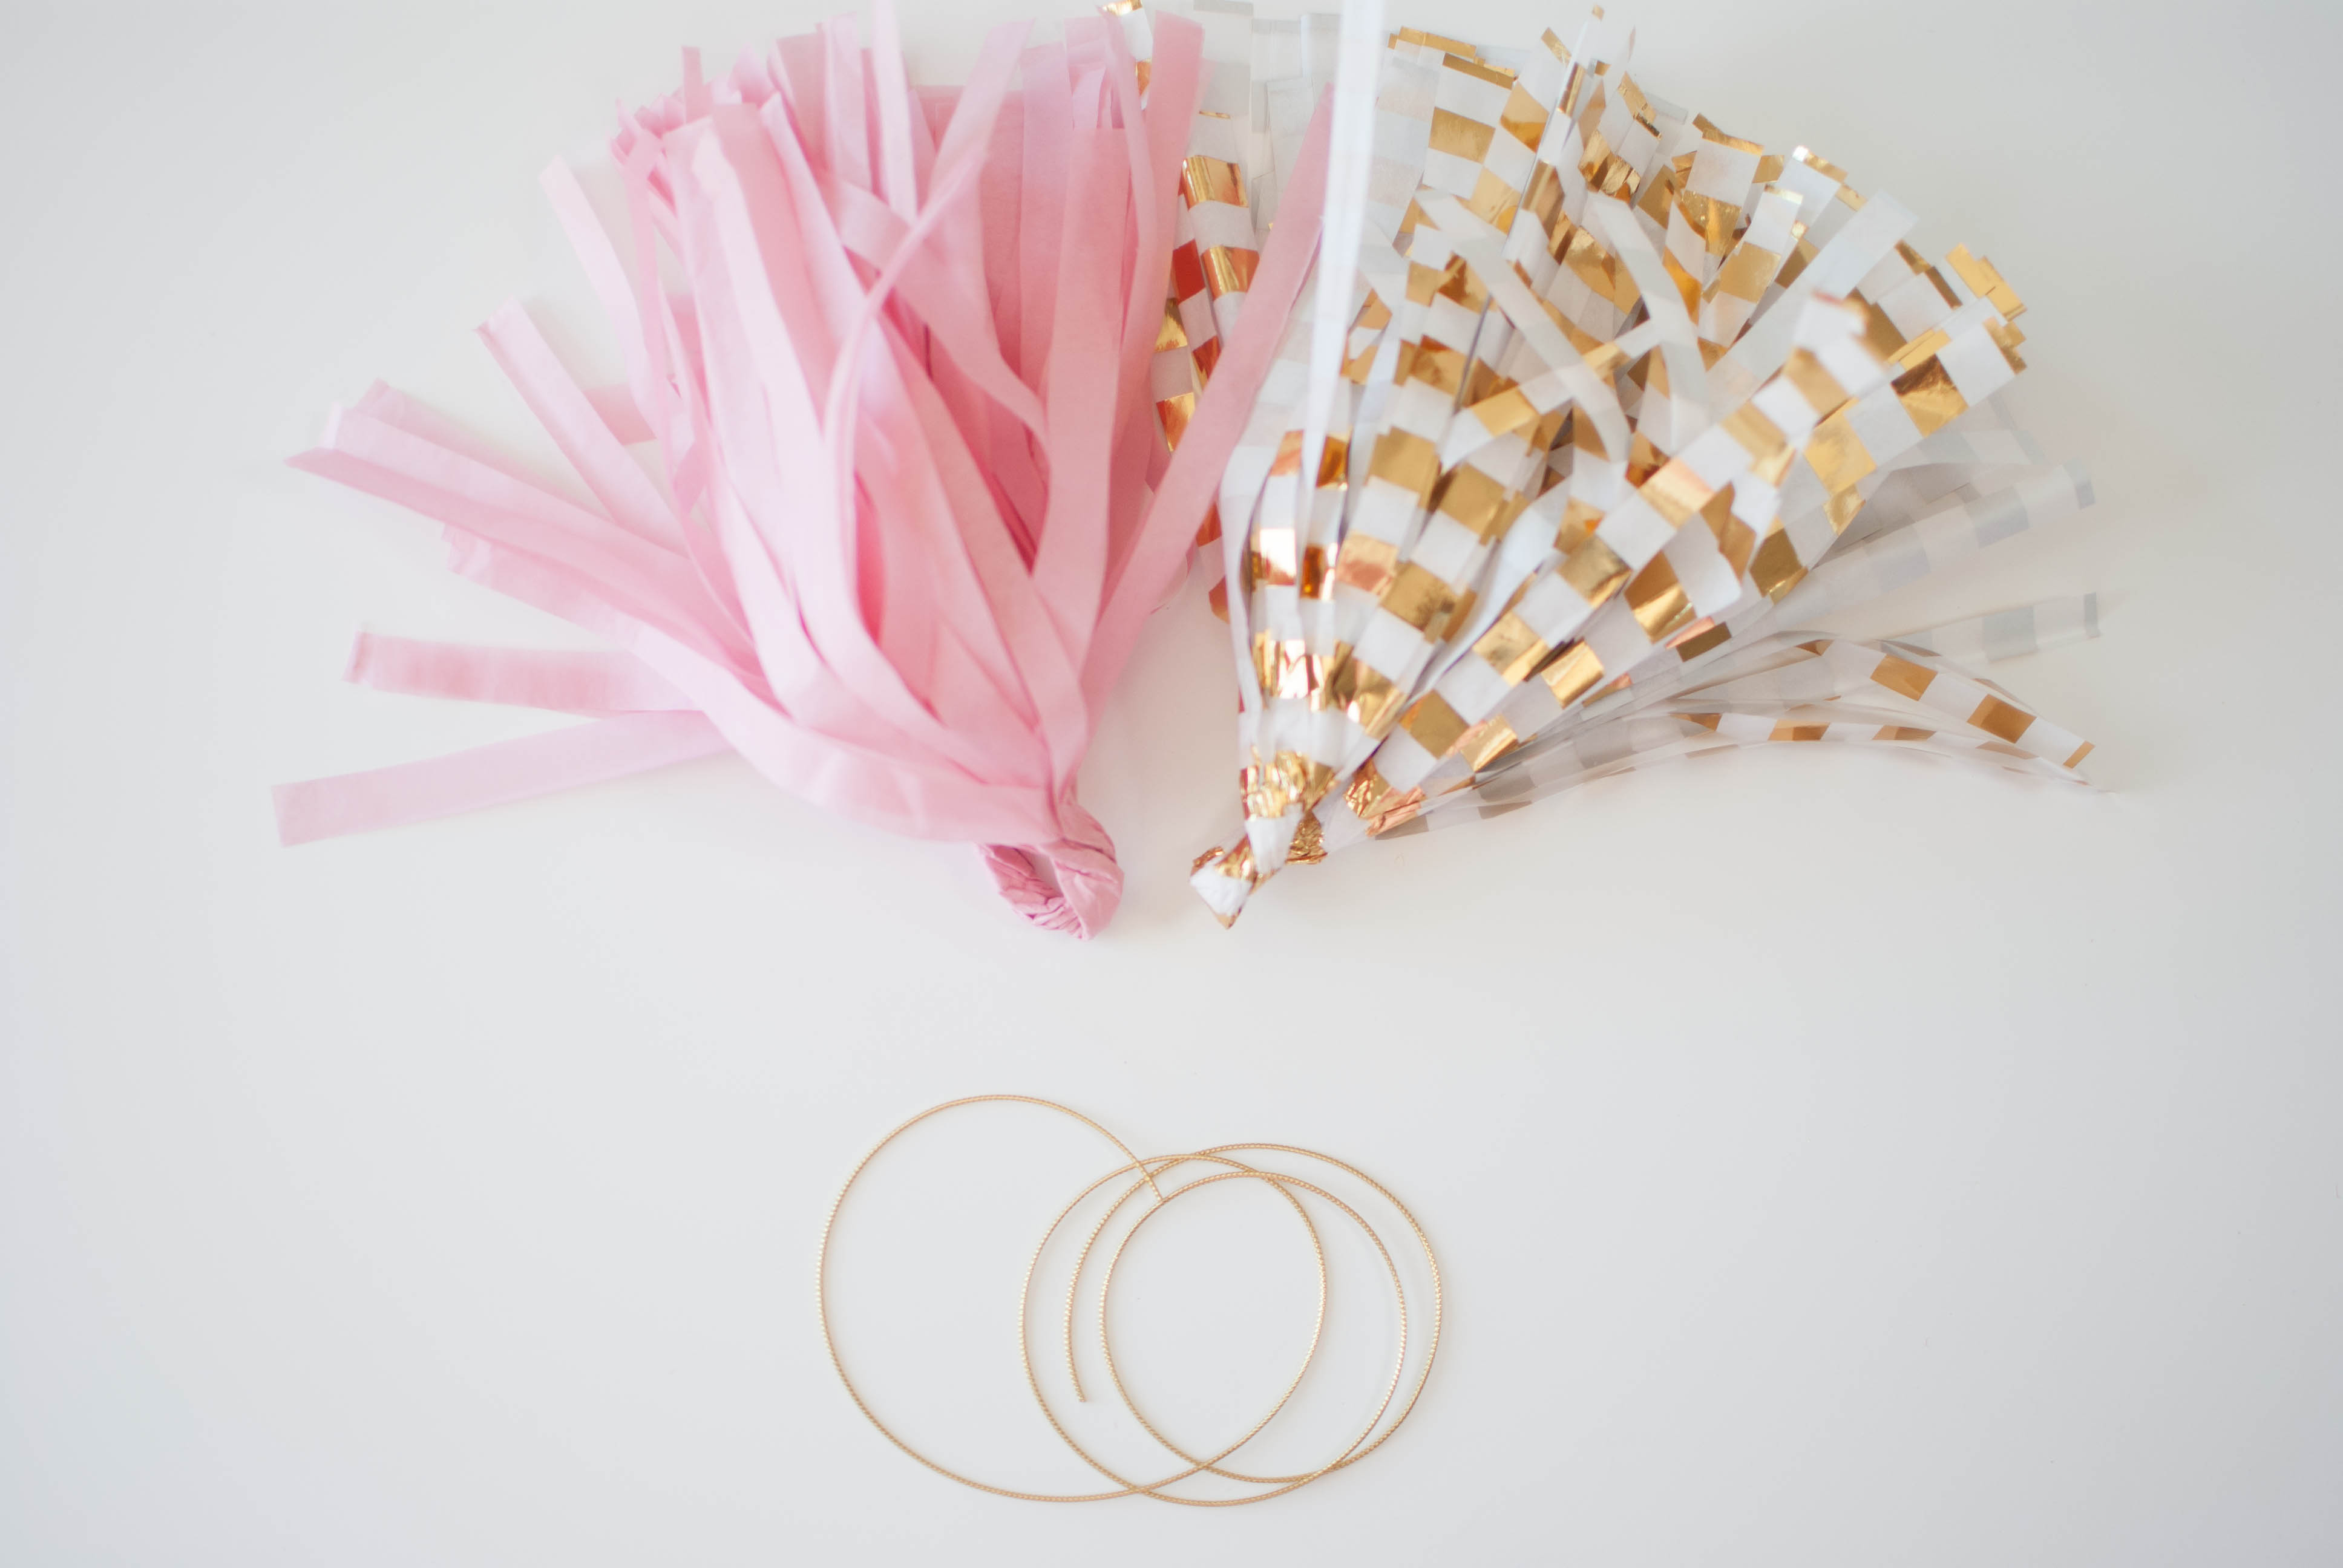
All you need is:
* 20×20 or 20×24 tissue Paper or Mylar Sheets
* String (Baker’s twine or ribbon)
* Scissors
* Glue
Instructions:
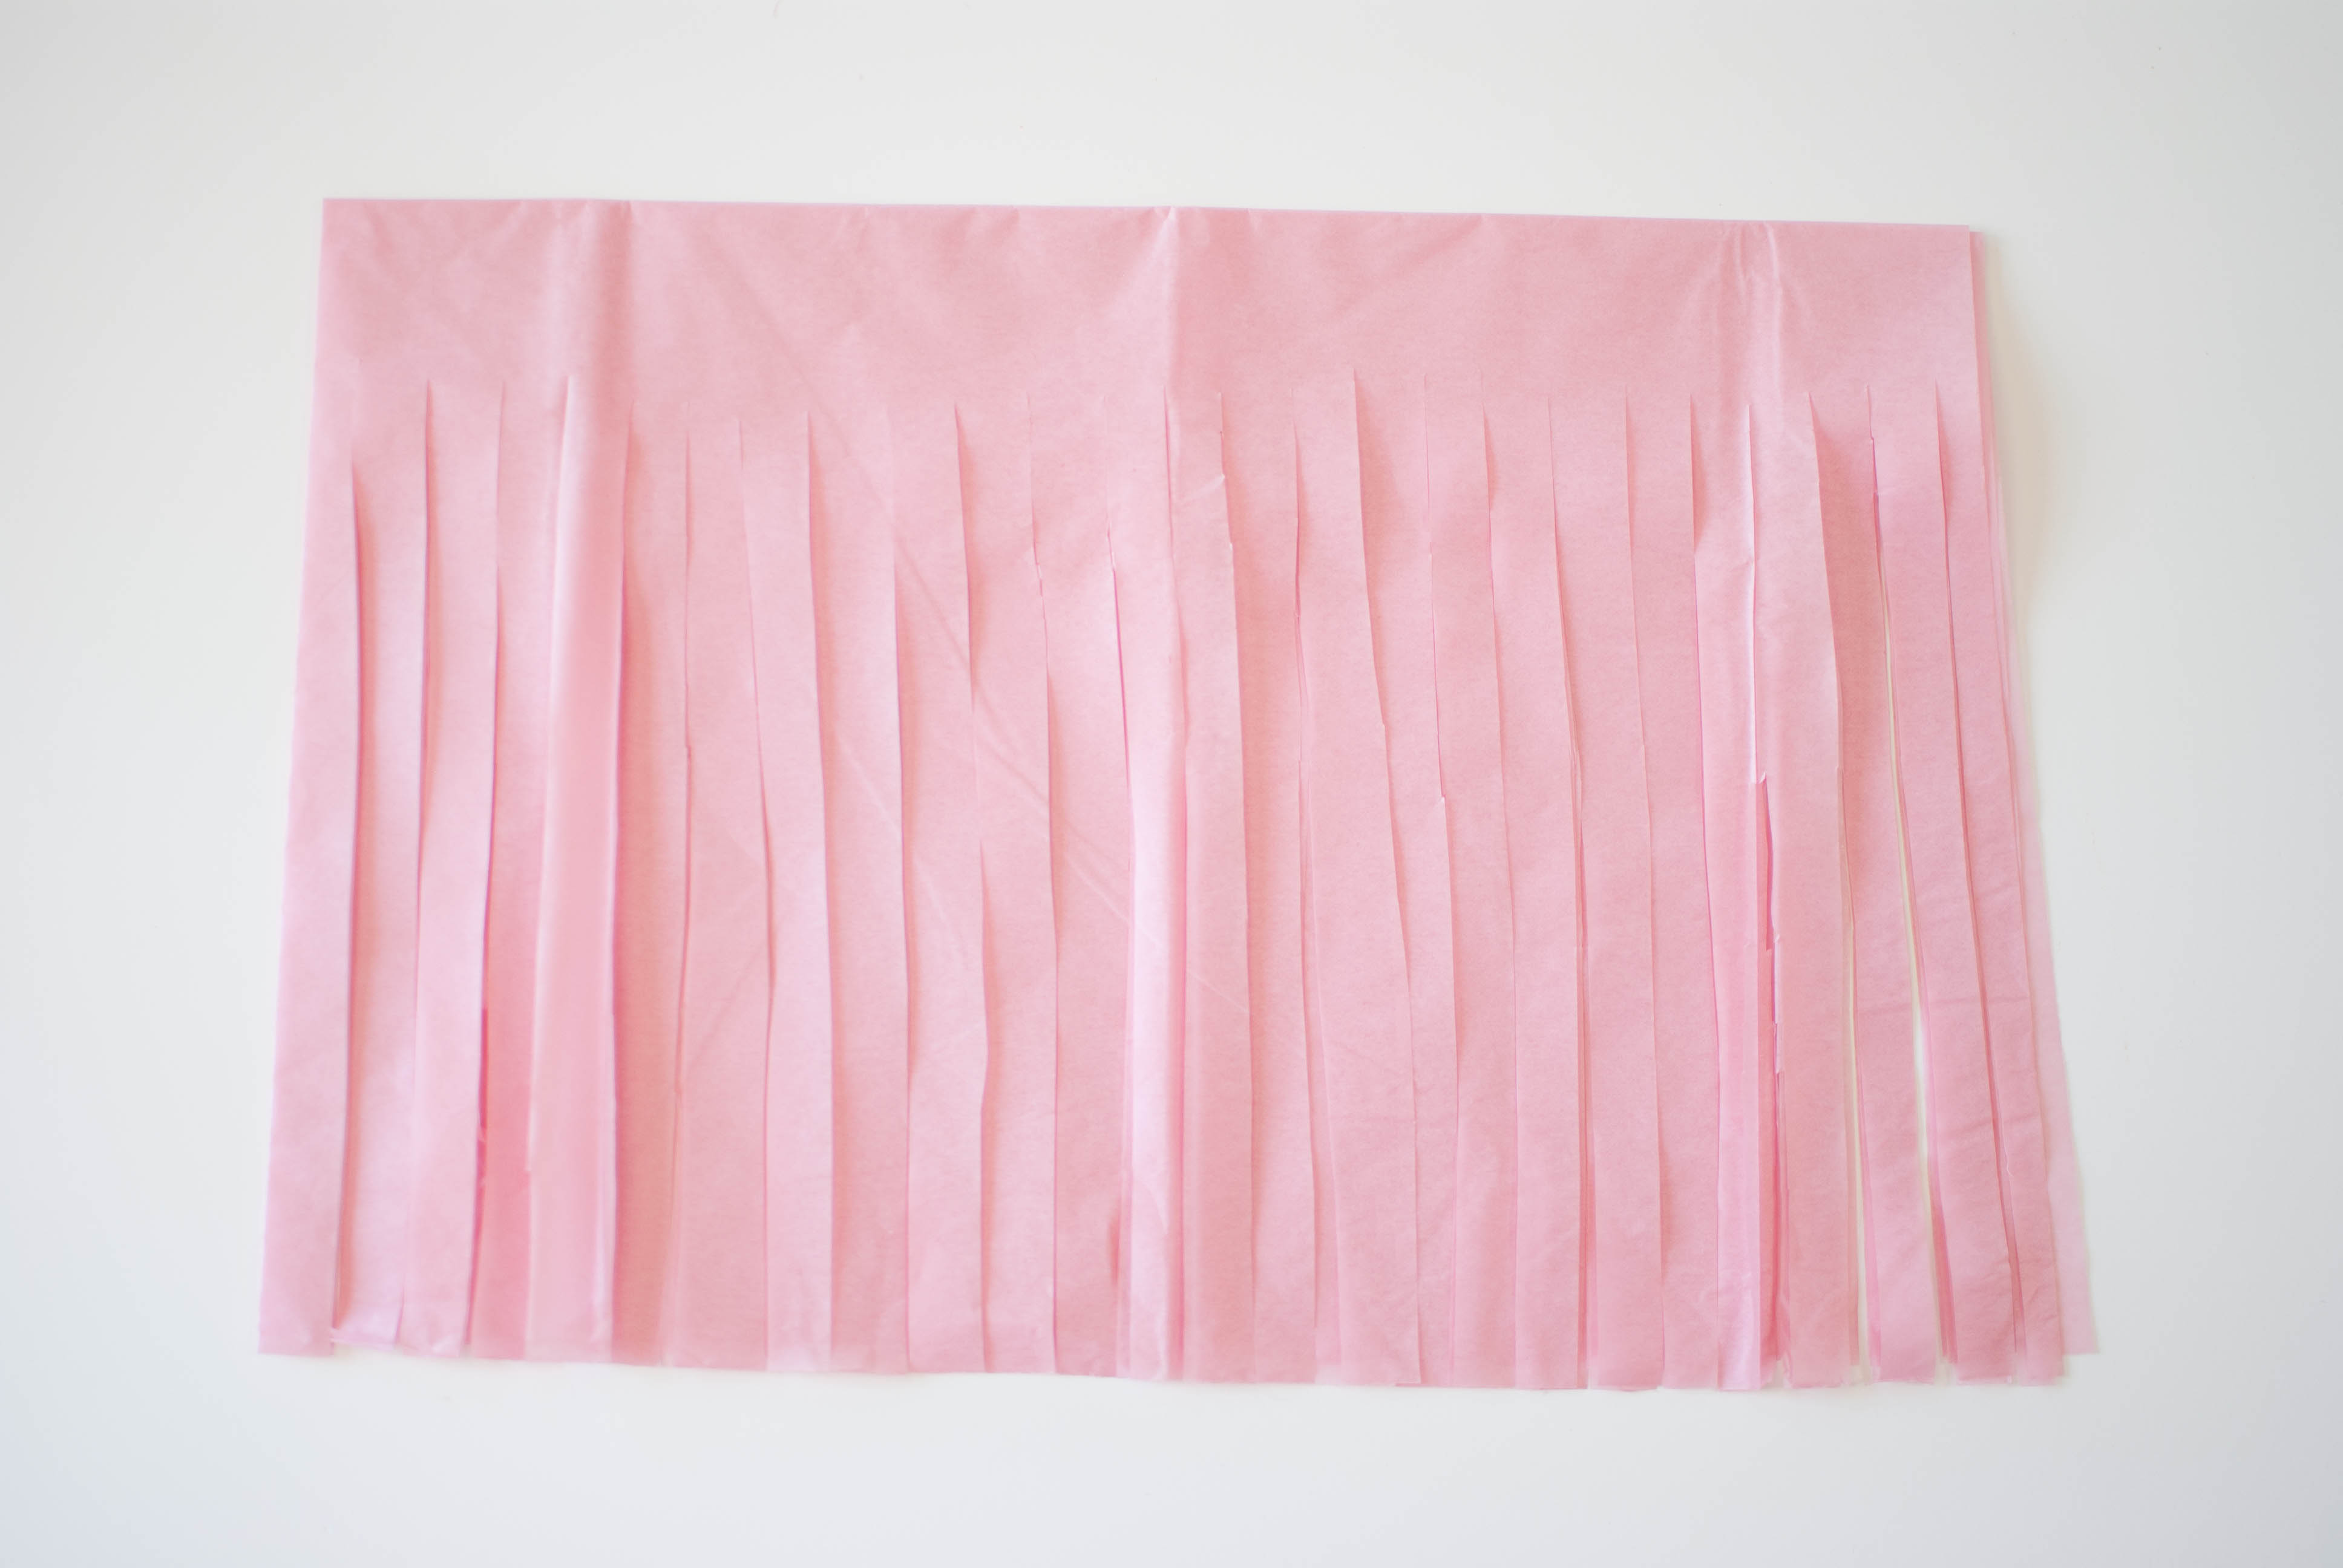
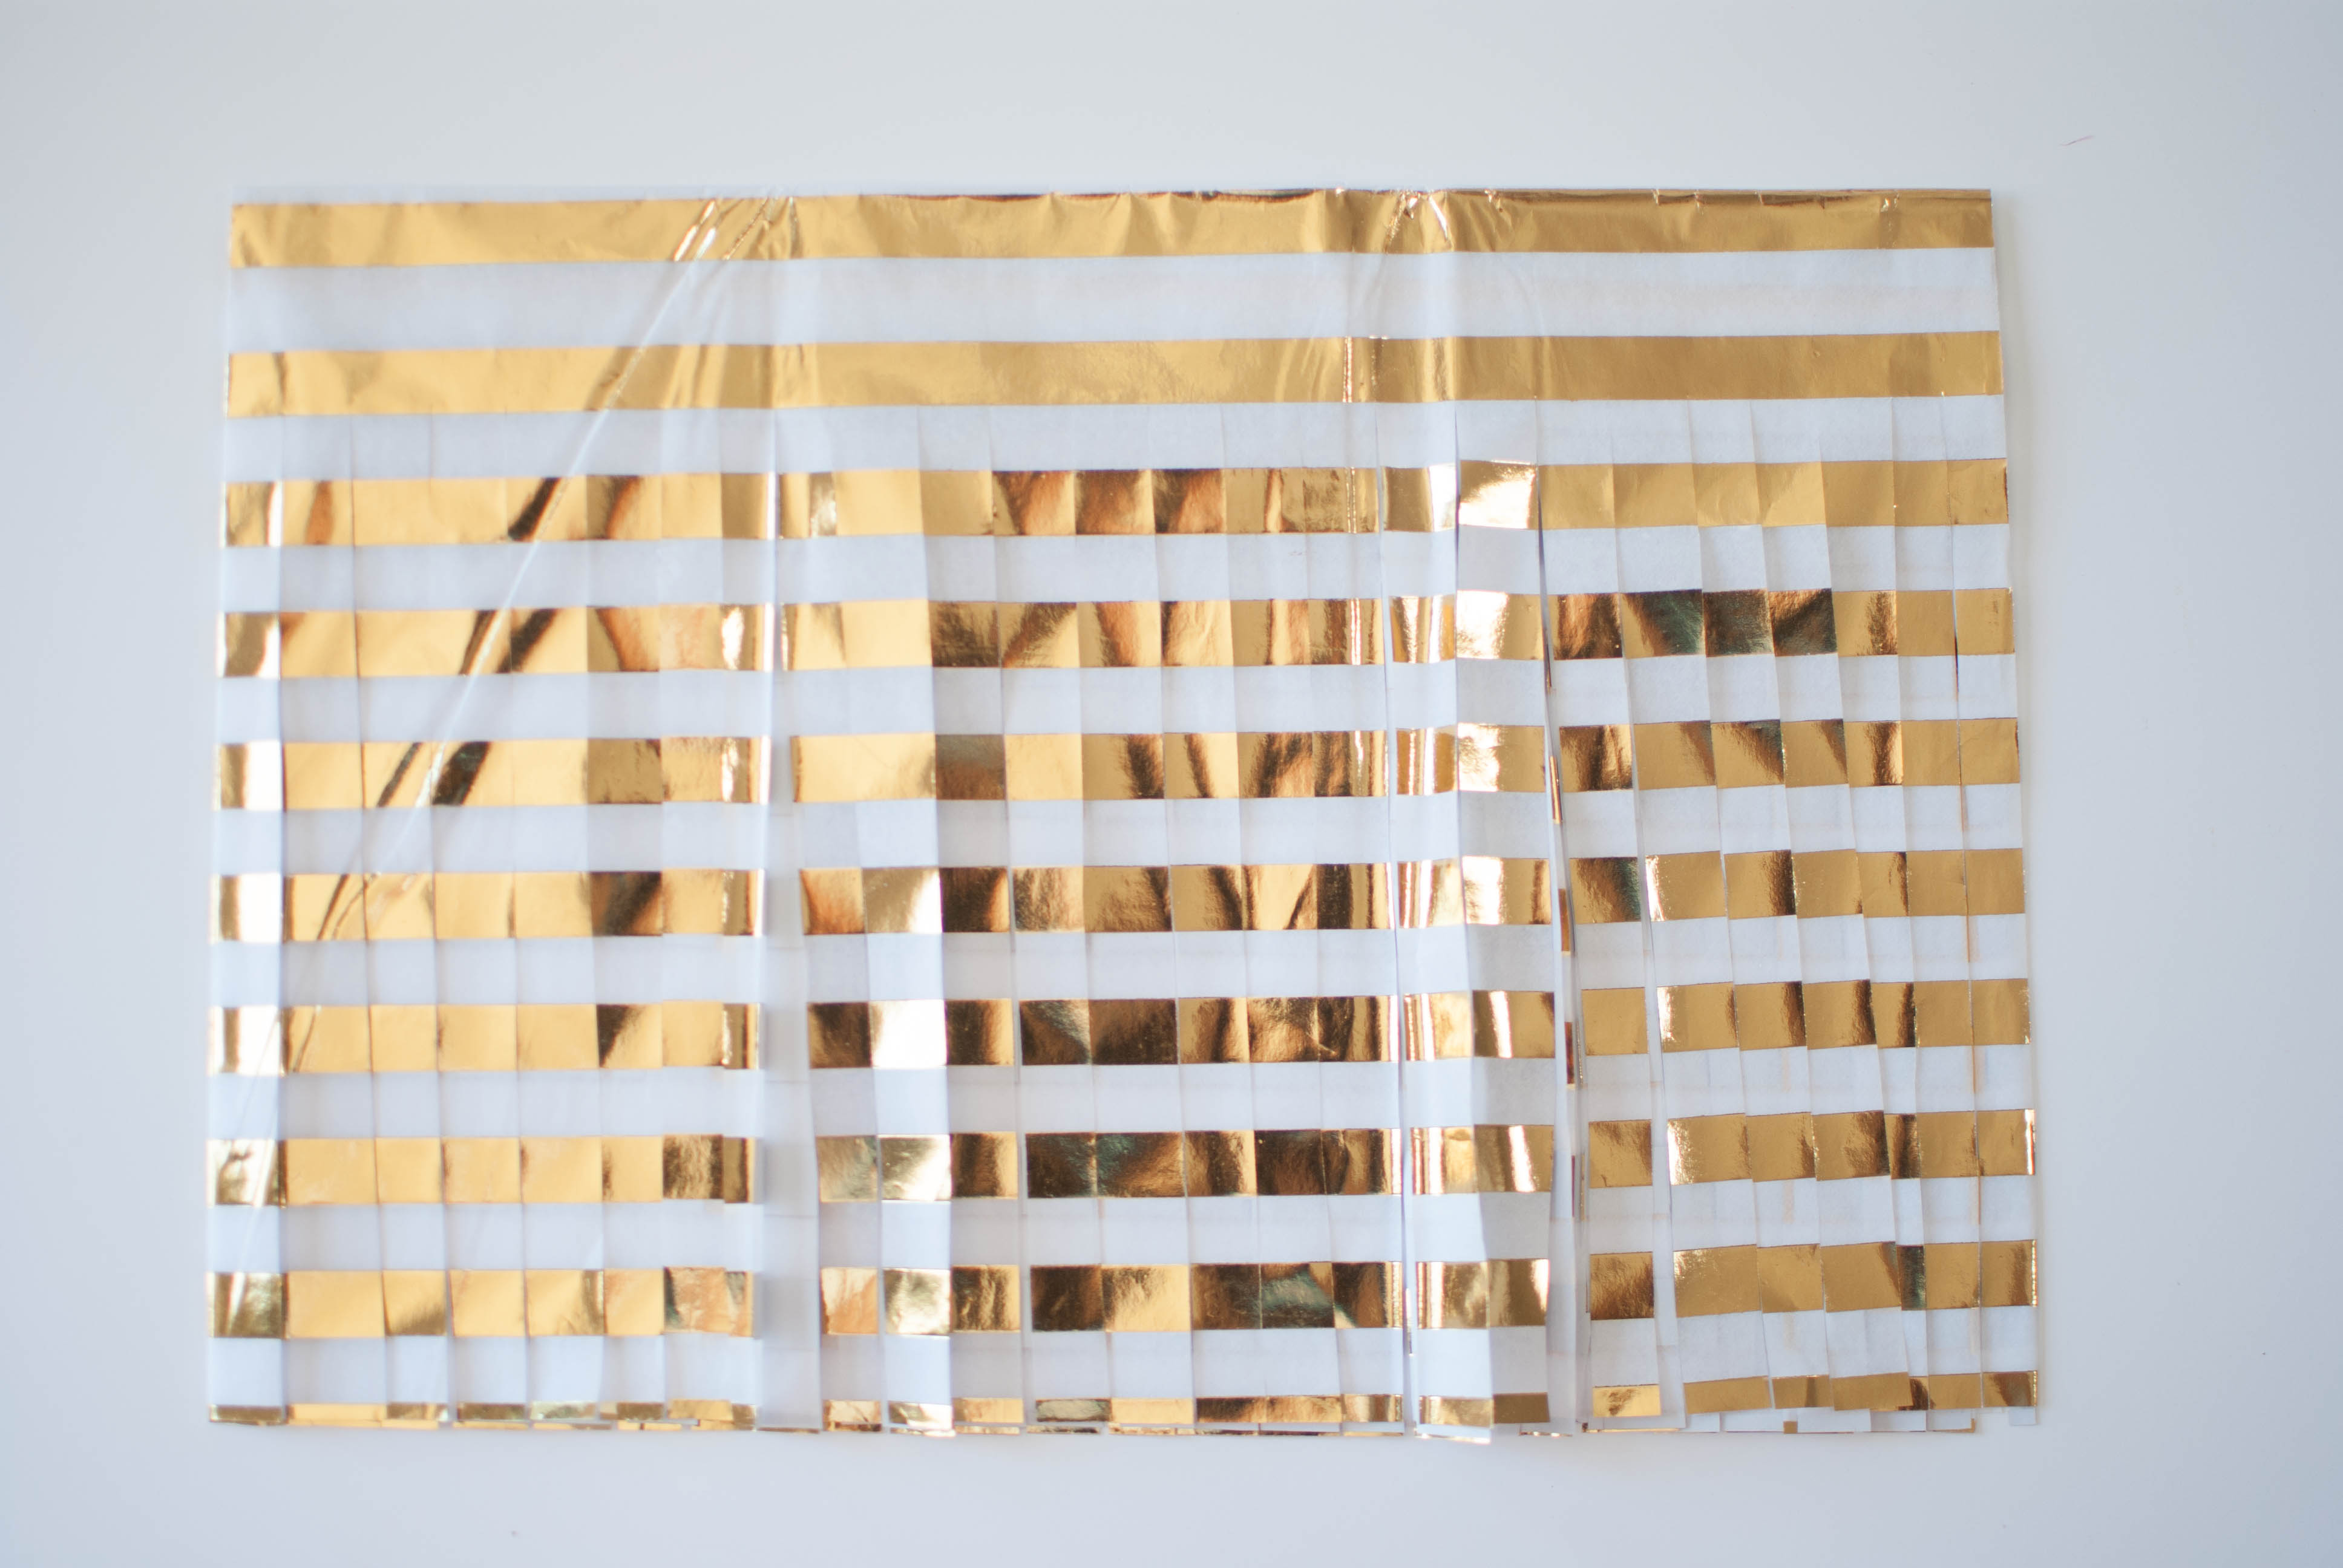
1. Fold one sheet of tissue paper or mylar sheet in half horizantally and vertically.
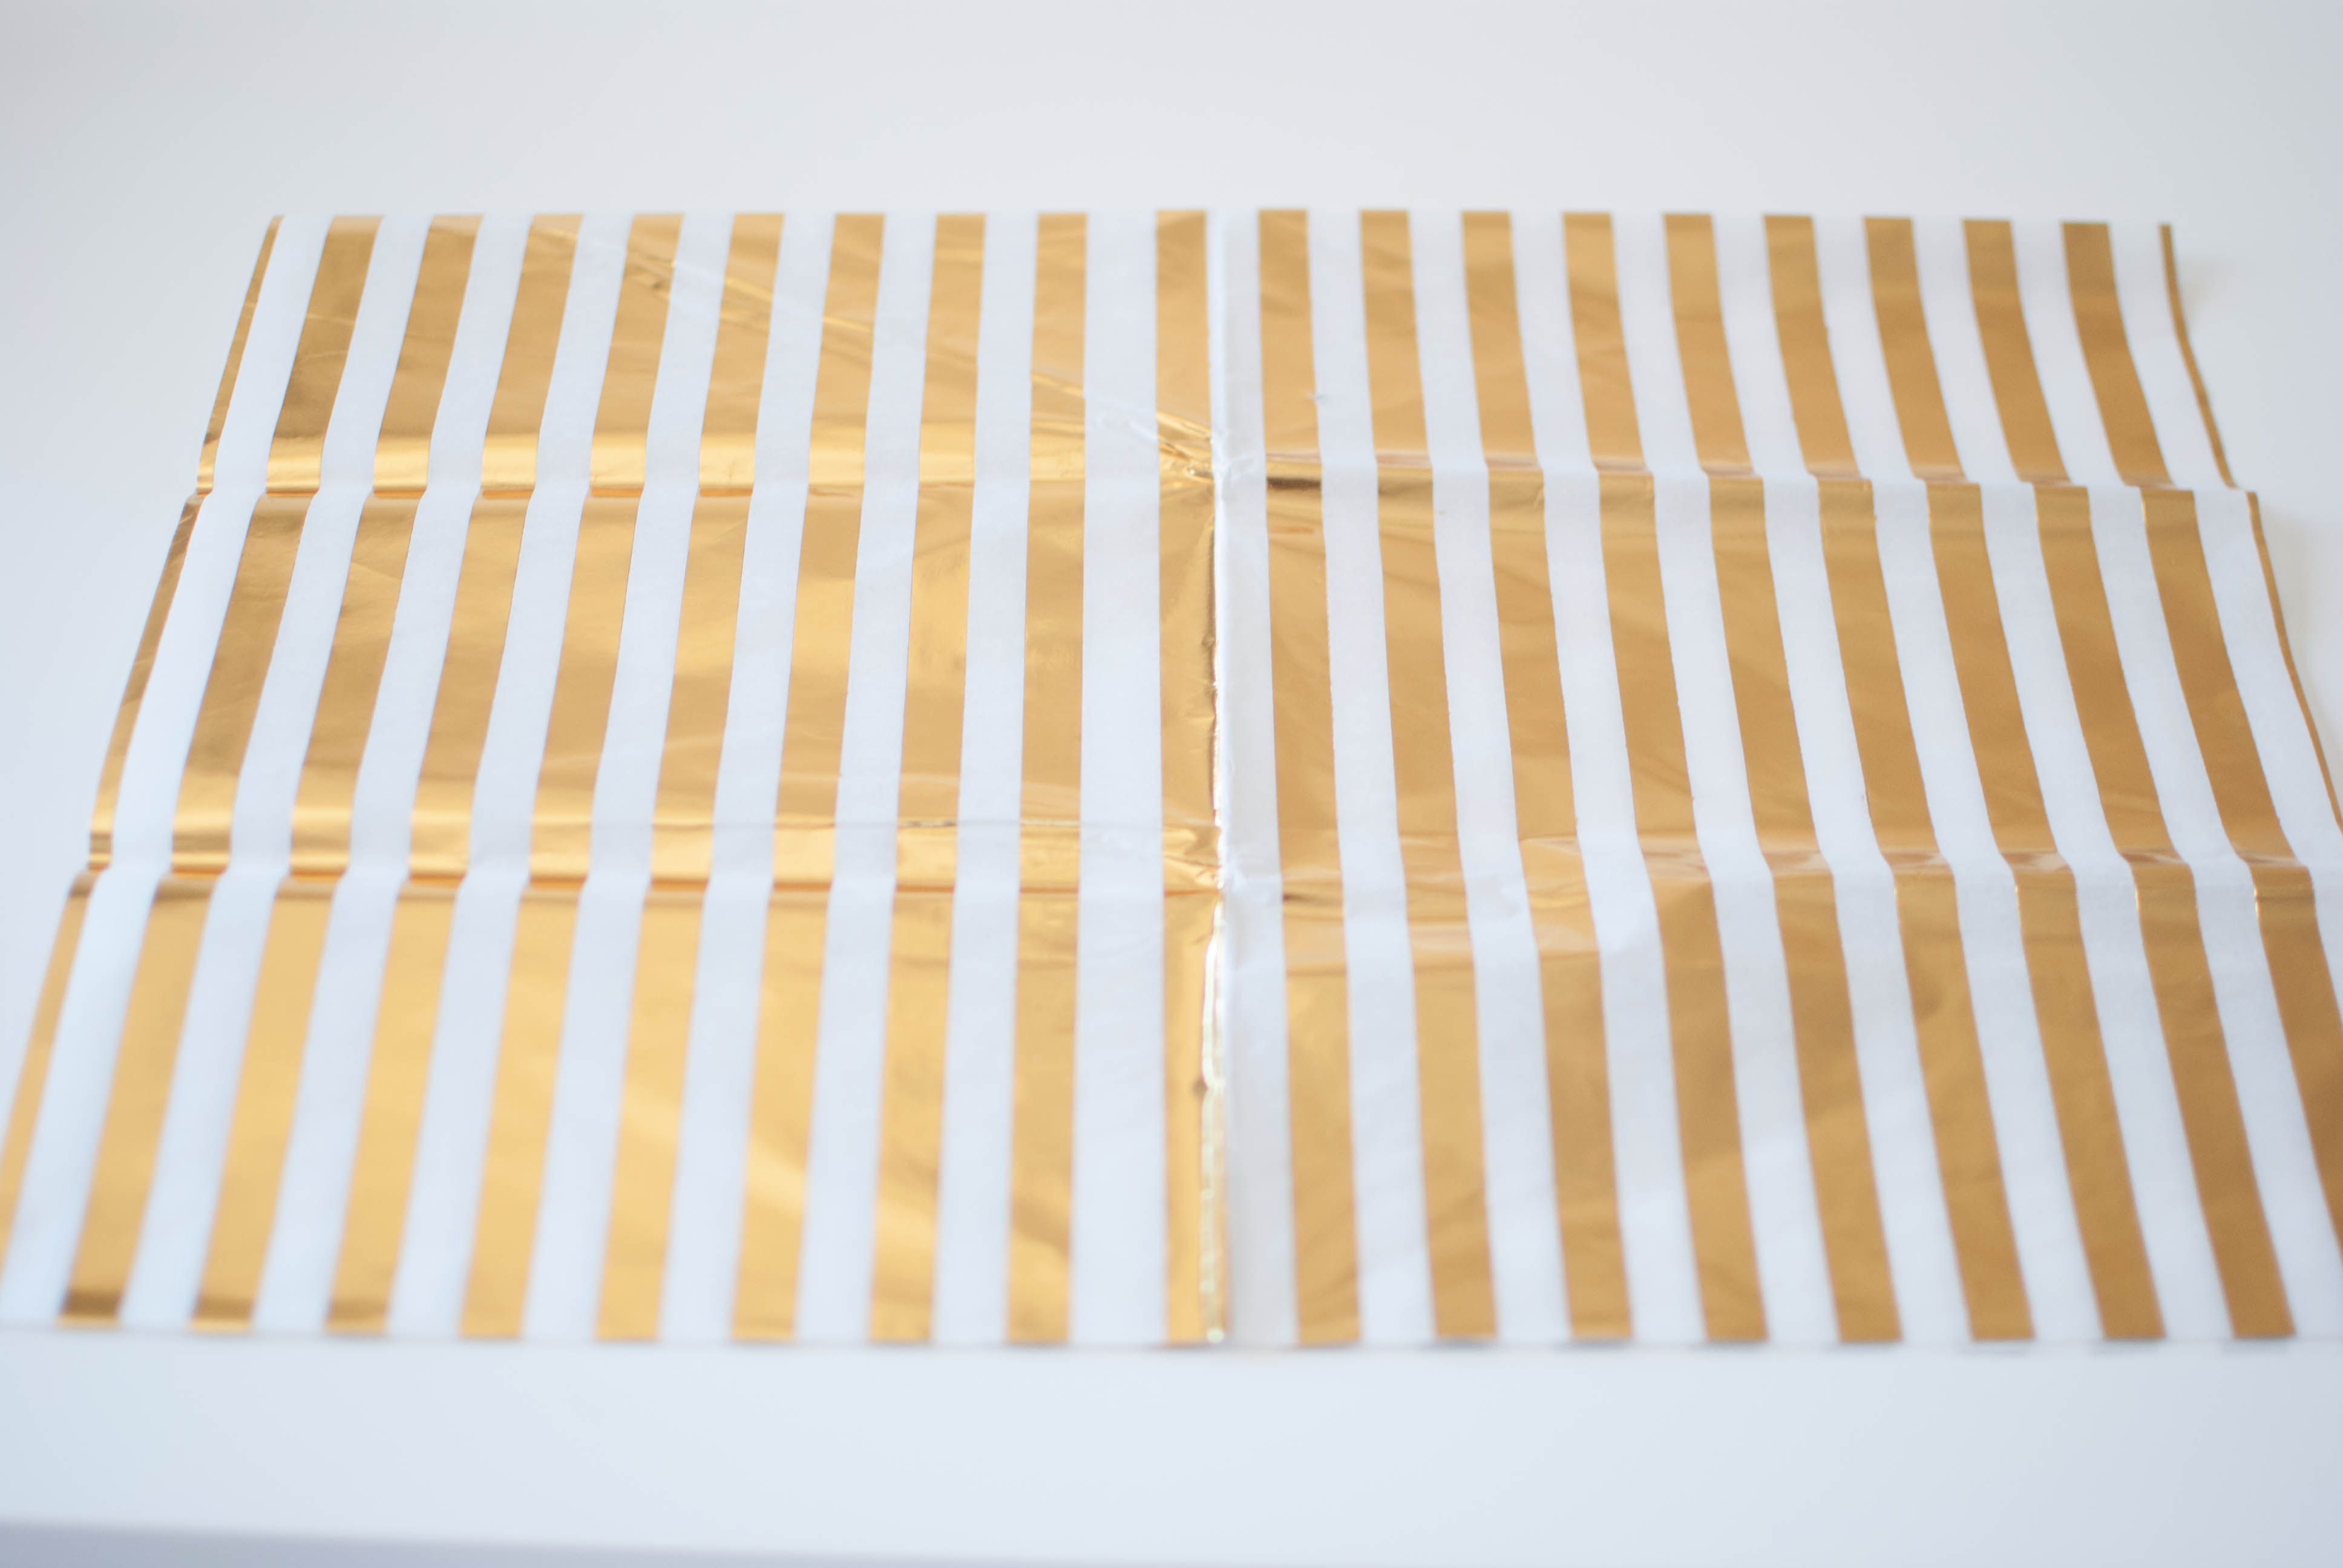
2. Use your scissors to cut thin verticall strips. Note: Leave about 1 inch on top of the sheet (uncut).
3. Unfold each sheet, flatten all the strips out. Start rolling each paper from the uncut mid section.

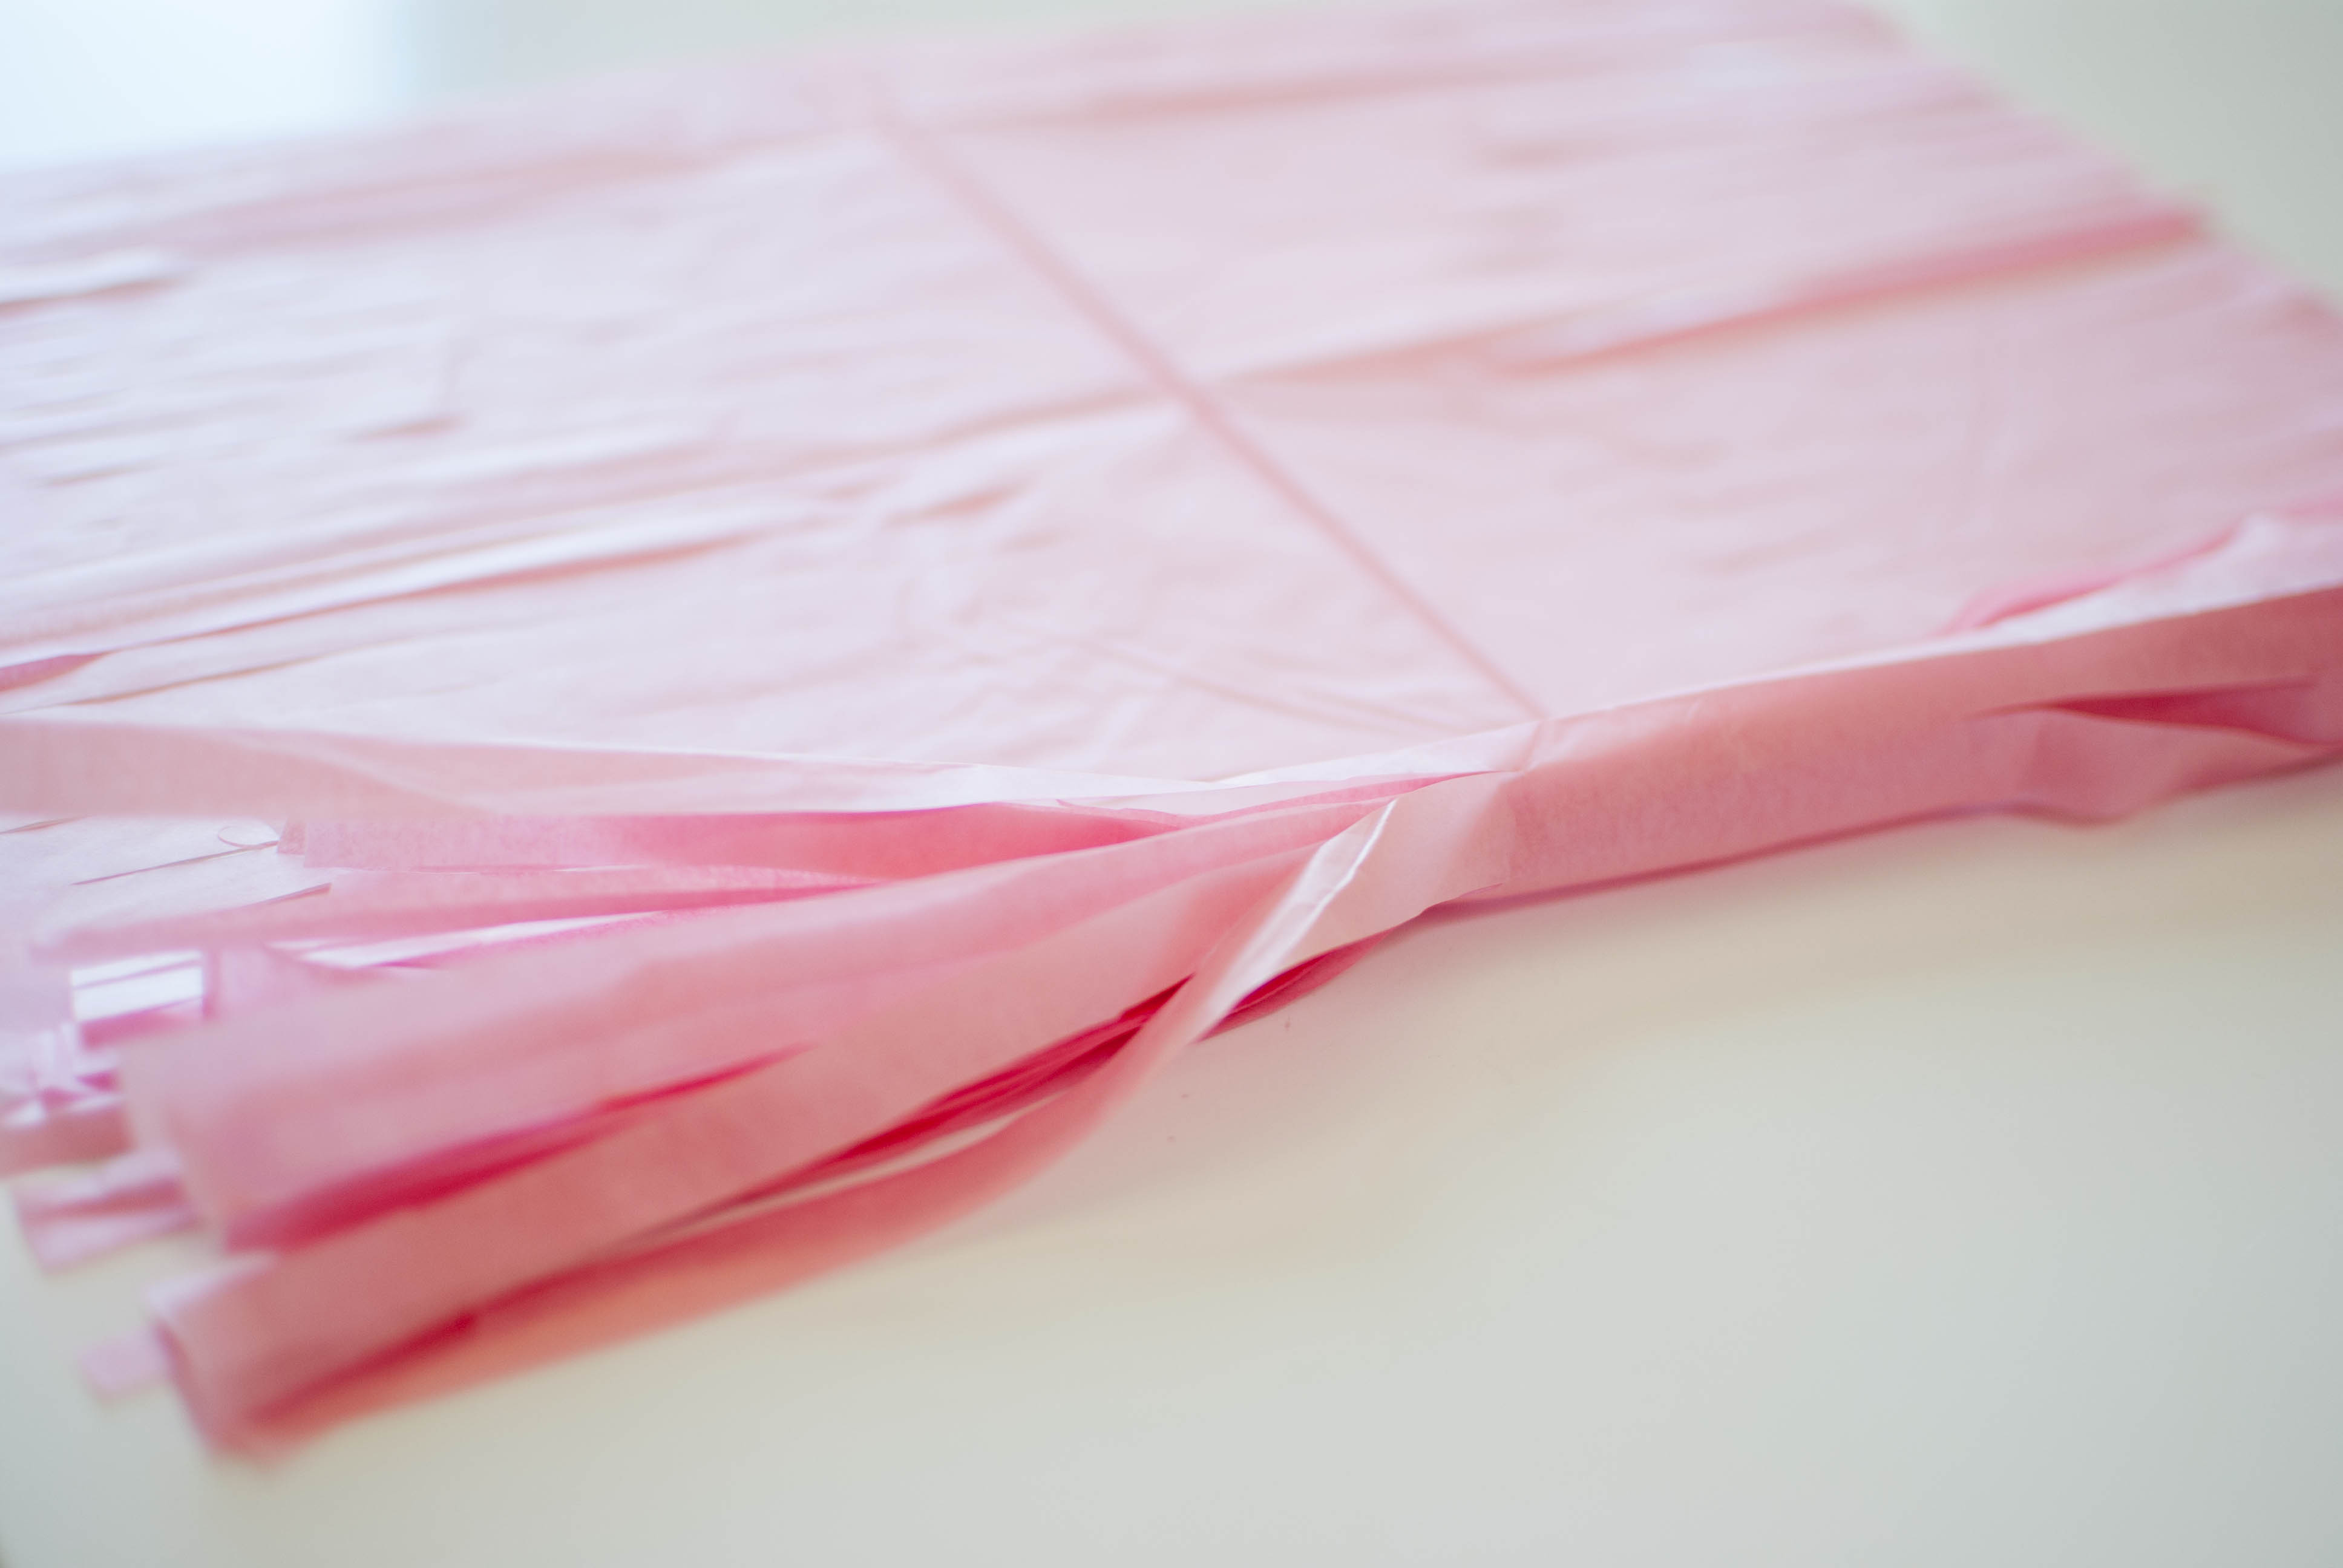
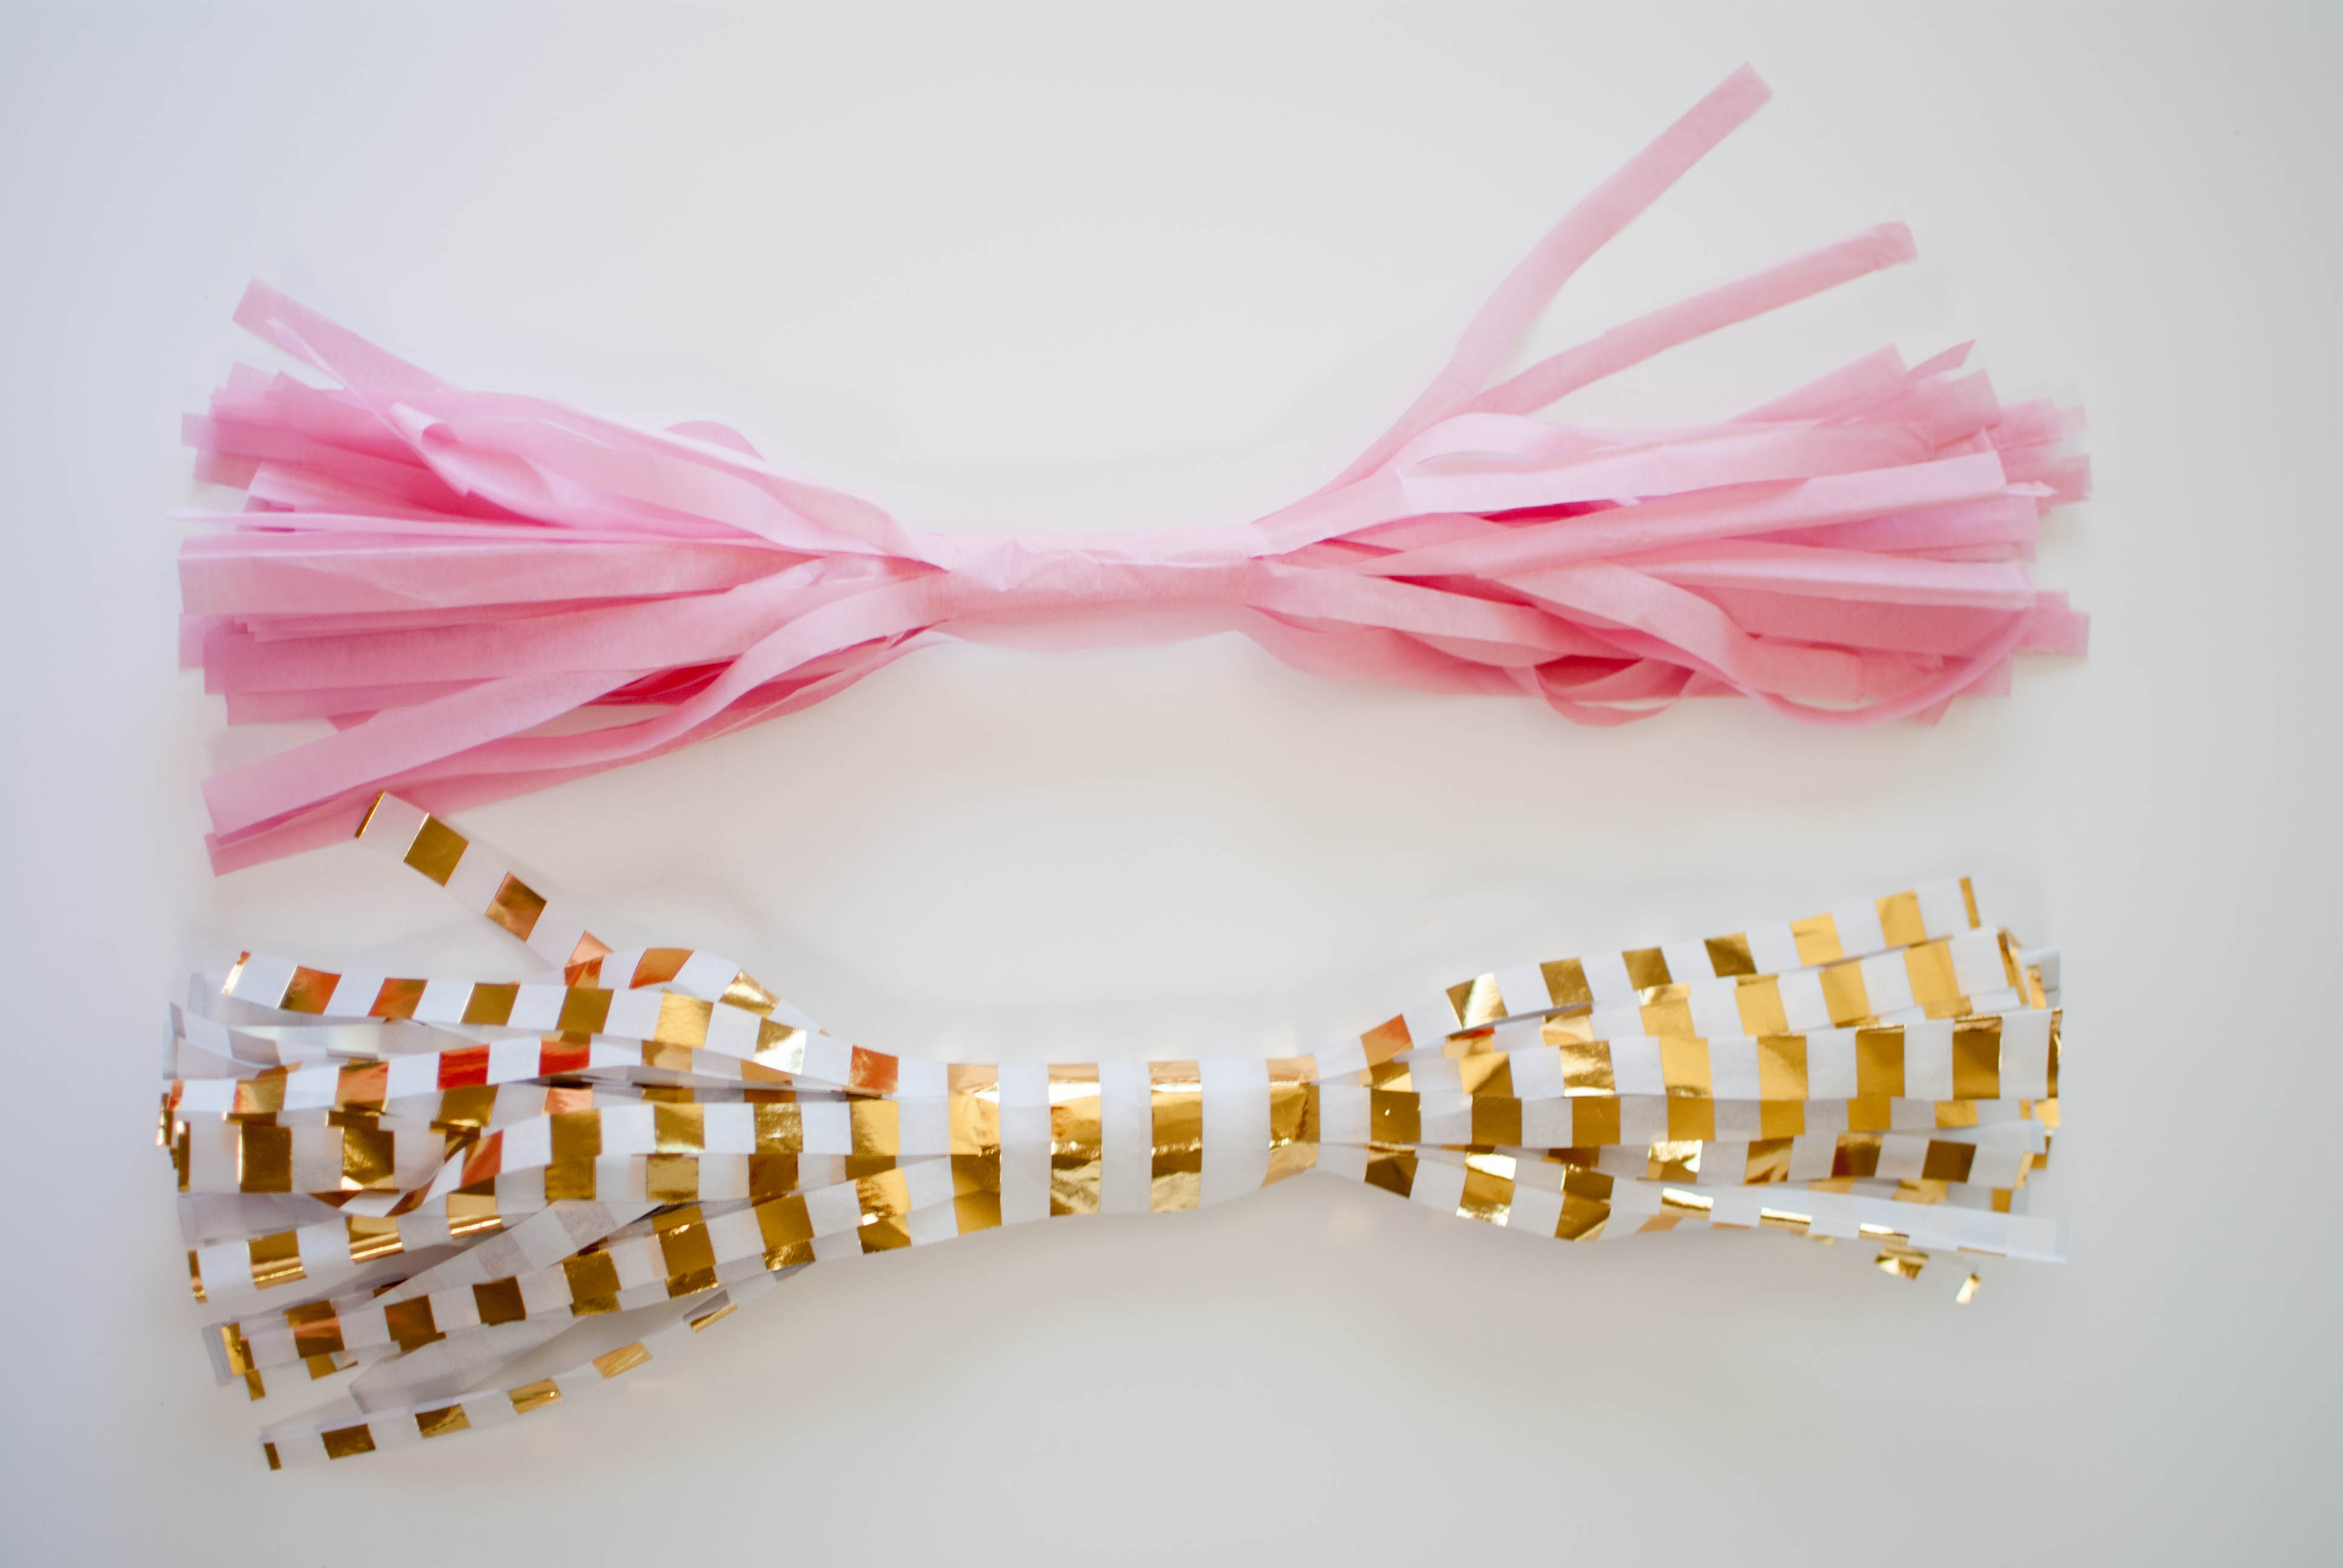
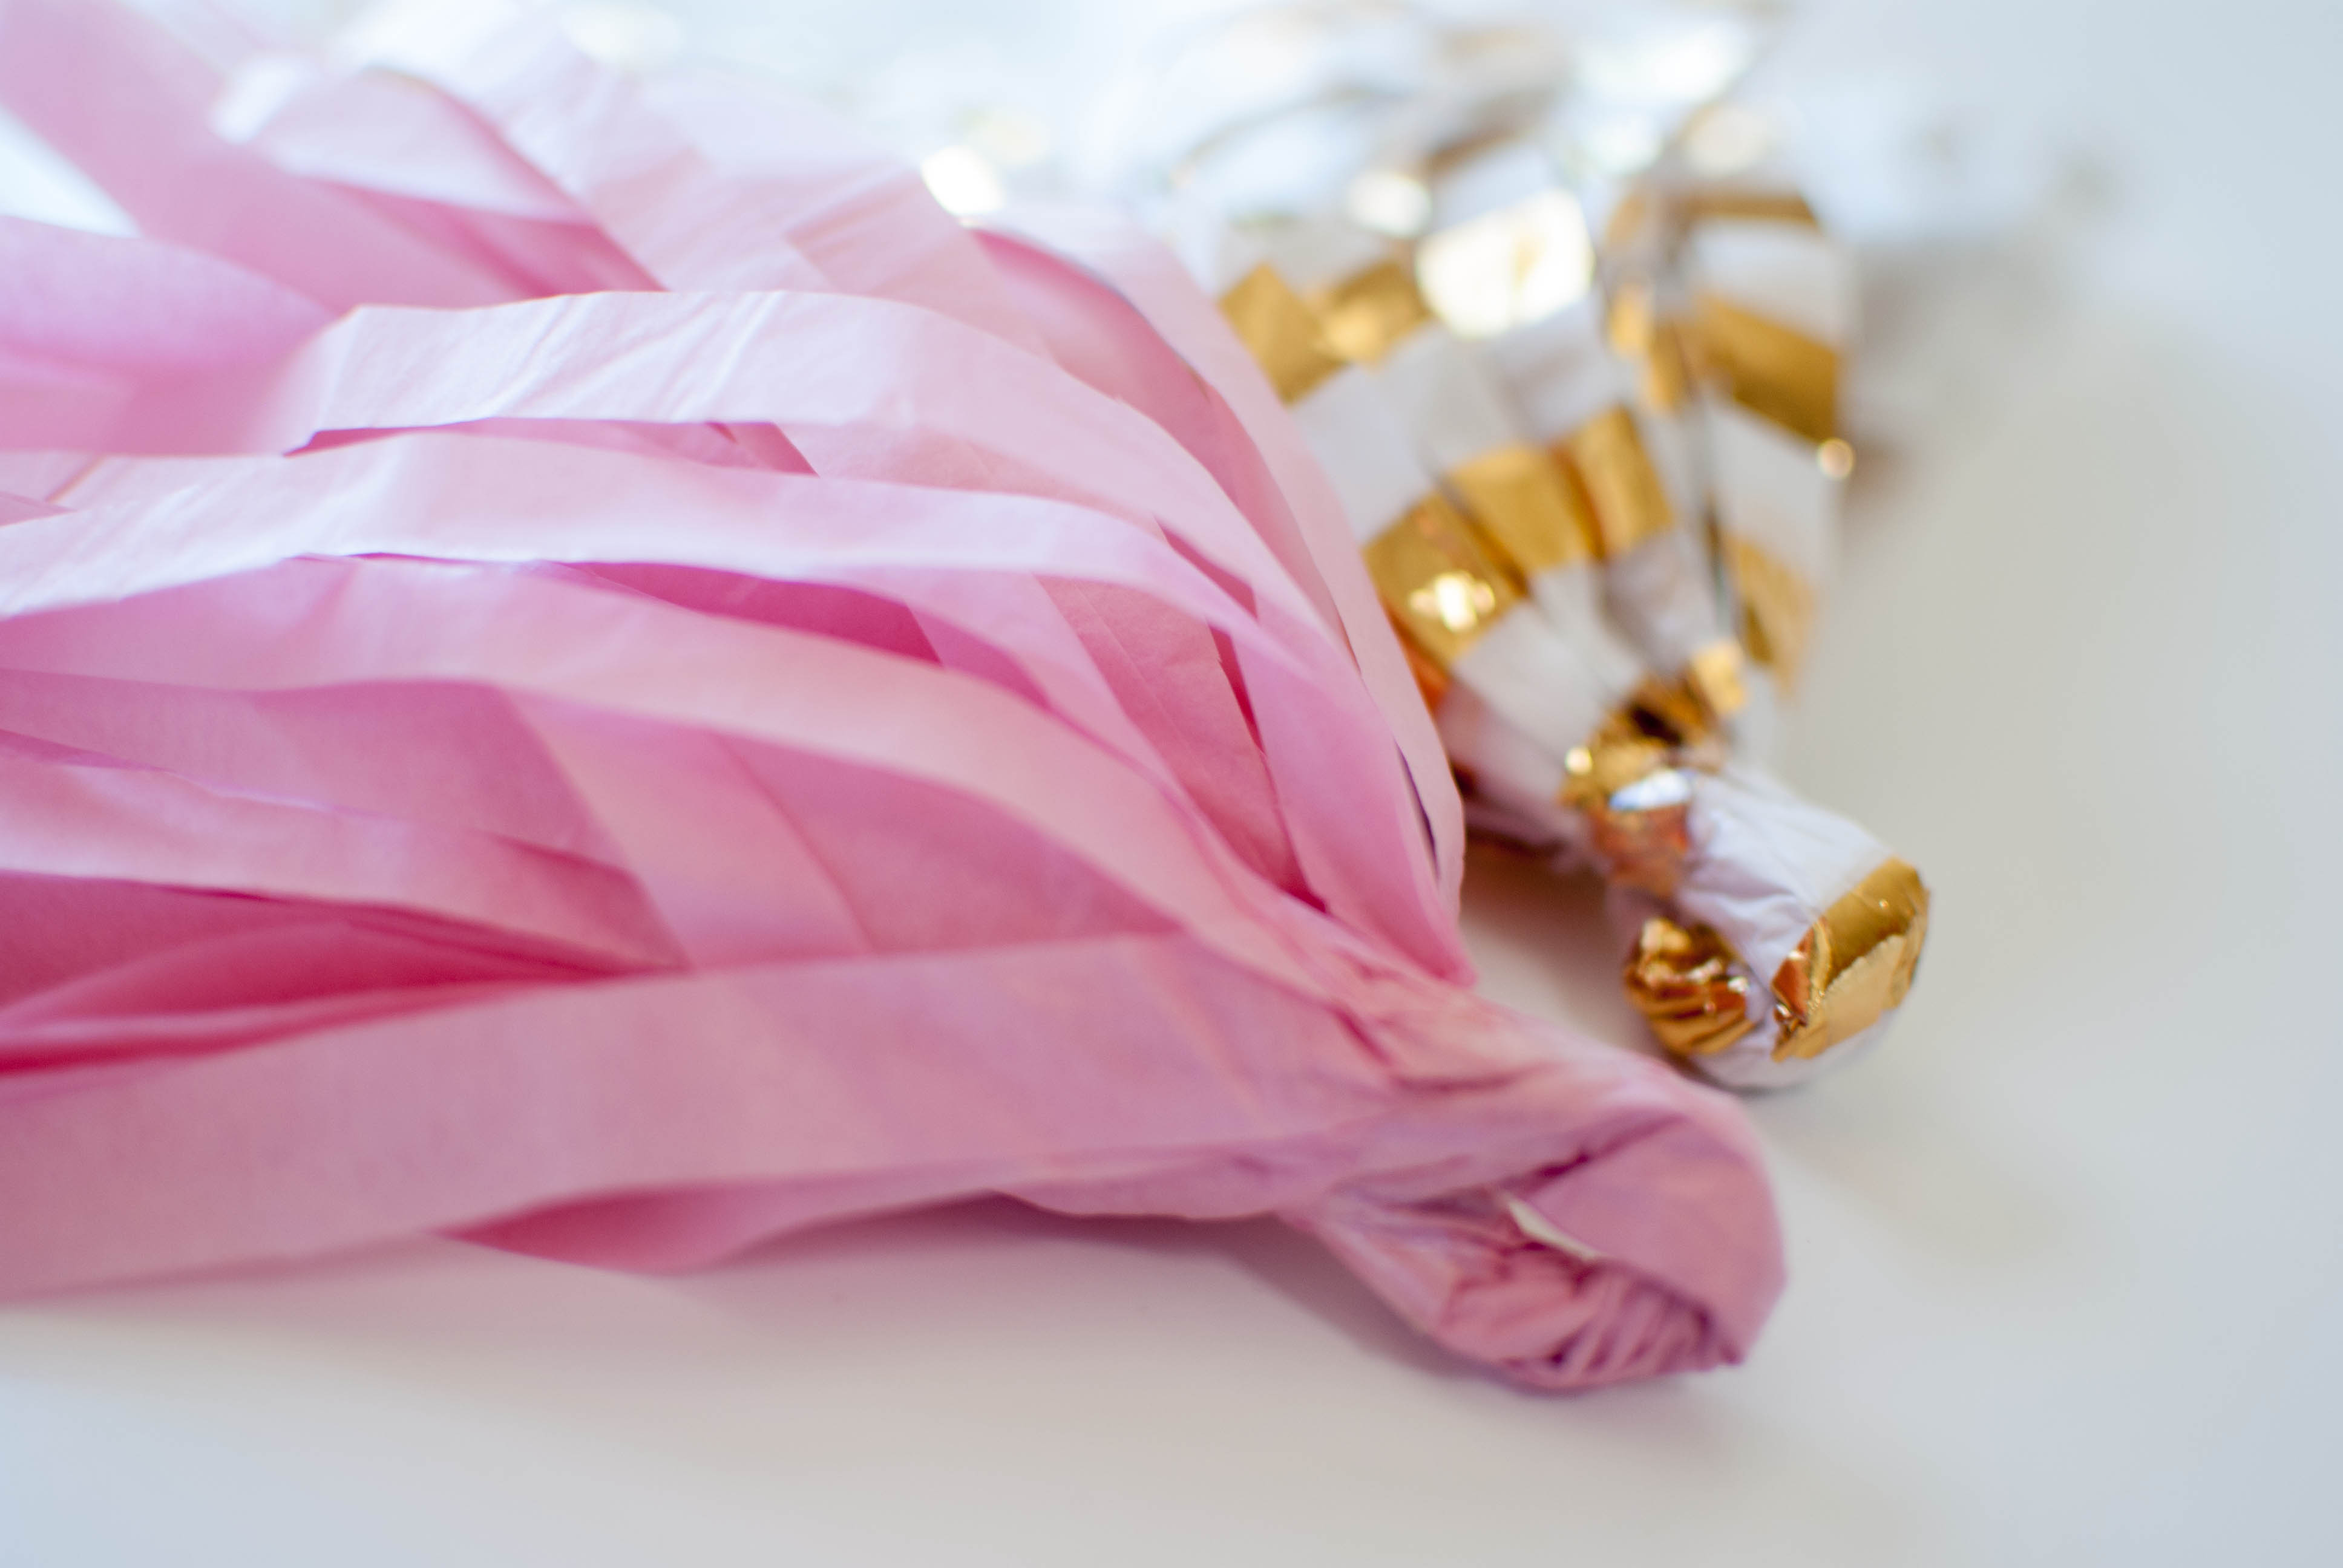
4. Twist the mid section.

5. Twist the mid section around itself. Create a loop for hanging. Use a dab of glue to hold them together. Note: Let them dry before hanging.
6. Make as many tassels as you need. Use string (ribbon, baker’s twine) to hang them.
I put a printable PDF together with the step by step. Download your Tissue Tassel Garland Tutorial file now!
xoxo
Andressa